
Ultimate Japanese Katsu Bowls with Crispy Chicken

Oh, hello there, my cooking friends! I’m Maya Anderson, and I’m so thrilled you’ve landed on whatwillcook.com today because I have something truly special to share. I’ve always found immense joy in bringing restaurant-quality meals into my home kitchen, and today, I’m unveiling my absolute favorite way to create the magic of Japanese Katsu Bowls right on your countertop.
This dish is a flavor explosion, featuring perfectly crispy chicken, fluffy rice, and a vibrant array of toppings, all brought together by a dreamy spicy mayo. It’s a meal that looks impressive but is surprisingly simple to pull off, taking me only about 30 minutes to get on the table. Trust me, once you try this recipe, you’ll understand why I can’t stop making it!
Table of Contents
Why You’ll Love Our Japanese Katsu Bowls (Beyond the Ordinary!)
I truly believe this recipe for Japanese Katsu Bowls stands out for so many wonderful reasons, and I can’t wait for you to experience them! First, I’ve designed it for ease, making a seemingly complex dish accessible for any weeknight. You don’t need a deep fryer to achieve that irresistible crunch.
Second, the crispiness of my chicken katsu is truly next-level, thanks to a simple trick I use with the Panko and sesame seeds. I find the texture contrast between the crunchy chicken and the soft rice absolutely divine.
Finally, the homemade spicy mayo and the subtly sweet and savory chicken marinade create a perfect balance of flavors that will have you coming back for more. It’s a symphony of tastes in every bite!
All the Ingredients You’ll Need for Japanese Katsu Bowls
I’m all about clear, simple lists when I cook, so here are all the exact ingredients you’ll need to create your own incredible Japanese Katsu Bowls! I’ve broken them down by function to make your prep even easier.
For the Chicken Katsu & Marinade
- 2/3 cup, plus 2 tablespoons tamari or soy sauce
- 1 tablespoon toasted sesame oil
- 1 tablespoon honey
- 2 teaspoons grated ginger
- 2 tablespoons chopped green onions
- 1 teaspoon, plus 3 tablespoons sesame seeds
- 4 chicken cutlets, or 2 boneless chicken breasts, sliced in half horizontally
- 1 cup Panko
- chili flakes
For the Spicy Mayo
- 1/3 cup olive oil mayo
- 1 to 2 tablespoons sriracha
- 2 teaspoons soy sauce or tamari
- 1 teaspoon honey
For the Bowl Assembly & Toppings
- 1 bag frozen shelled edamame
- 3-4 cups rice, cooked
- cucumber, avocado, pickled ginger, and nori sheets – for serving
Step-by-Step: How to Make Japanese Katsu Bowls
I’ve broken down this recipe into easy-to-follow steps, just as I make it in my own kitchen. I’ve even included some of my personal pro-tips to ensure your Japanese Katsu Bowls turn out perfectly crispy and absolutely delicious every single time!
Step 1: Prep the Marinade & Chicken
I start by grabbing a medium bowl, and into it, I combine 2/3 cup tamari/soy sauce, the fragrant sesame oil, sweet honey, fresh grated ginger, vibrant green onion, 1 teaspoon of sesame seeds, and a pinch of chili flakes. This creates my flavorful marinade.
Then, I place the chicken in a separate bowl and pour over about 3-4 tablespoons of this incredible sauce, making sure to save the rest for serving later. I let the chicken sit and soak up all those flavors for at least 10 minutes. This short marinating time really makes a difference in the final taste!
Step 2: Create the Perfect Panko Crust
Next, I get my crispy coating ready. In a shallow bowl, I combine the Panko breadcrumbs with the remaining 3 tablespoons of sesame seeds. I then take each piece of marinated chicken and dredge both sides through the Panko mixture.
This is where my pro-tip comes in: I really press down, using my fist to pound the crumbs firmly into the chicken. This ensures maximum adhesion and a truly irresistible crust when cooked. After coating, I transfer the chicken to a plate, ready for cooking.
Step 3: Cook the Crispy Katsu & Edamame
Now for the sizzle! I heat a few tablespoons of oil in a large skillet over medium-high heat. A little pro-tip here: I make sure the oil is shimmering before I add the chicken, as this helps achieve that beautiful golden-brown crispness. I add the chicken and cook it until it’s perfectly golden brown, which usually takes about 3-4 minutes per side. Once cooked, I transfer the Katsu to a cutting board. Don’t worry about cleaning the pan
I then add the frozen edamame directly to the same skillet and cook until thawed, which takes just a few minutes. I add 2 tablespoons of tamari/soy sauce to the edamame, cook for another minute to let the flavors meld, then remove it from the heat.
Step 4: Whisk Up the Spicy Mayo
While the chicken rests and the edamame cooks, I quickly whip up the Spicy Mayo. In a small bowl, I combine the olive oil mayo, sriracha (I adjust the amount to my preferred spice level!), soy sauce or tamari, and honey. I whisk everything together until it’s smooth and beautifully creamy. It’s so simple, but this sauce is a game-changer for the bowls!
Step 5: Assemble Your Delicious Katsu Bowls
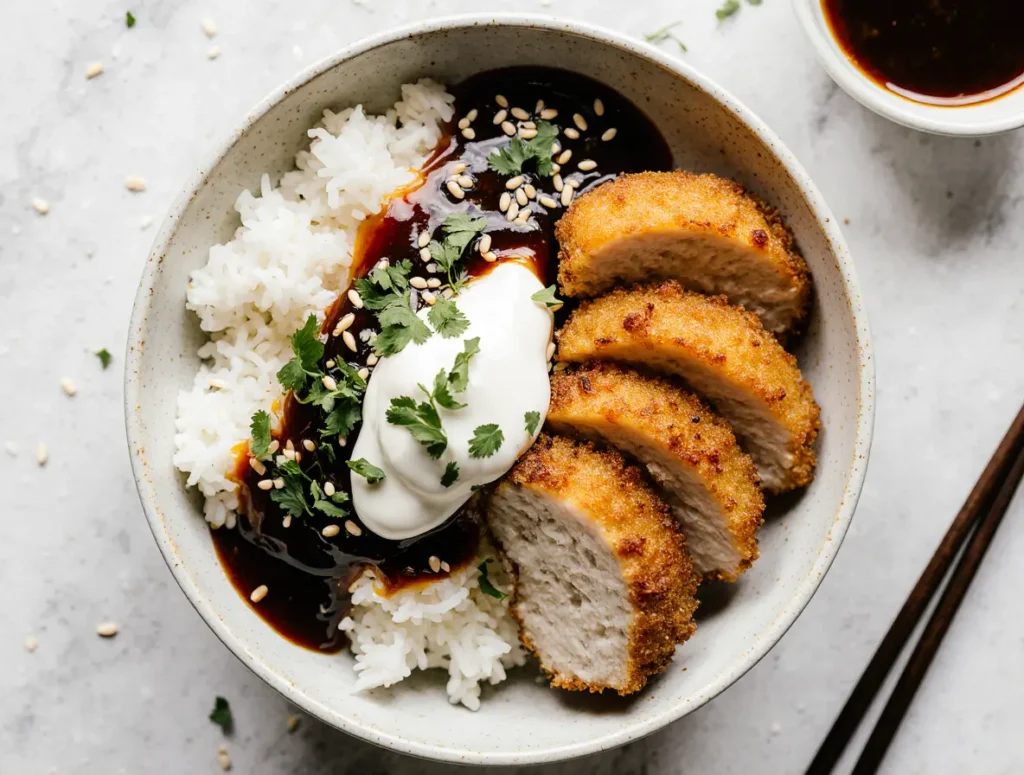
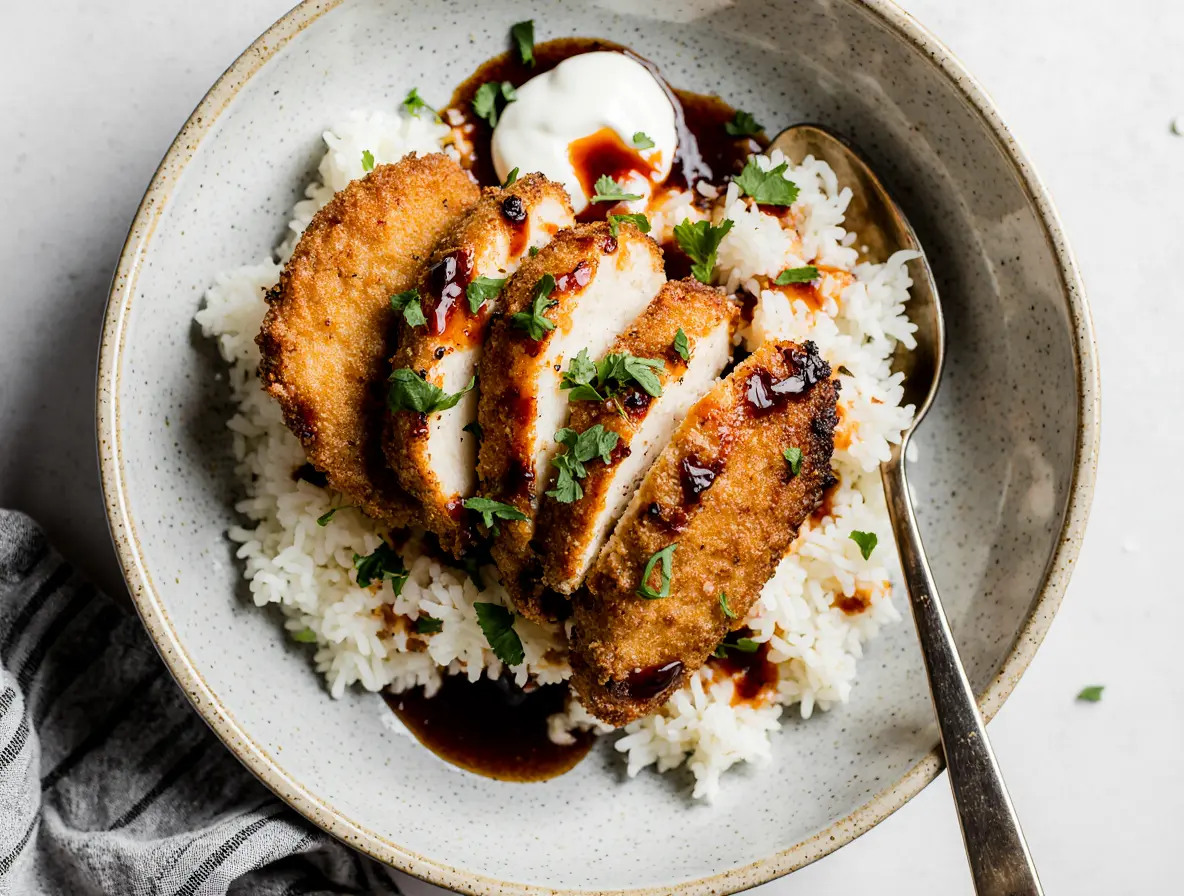
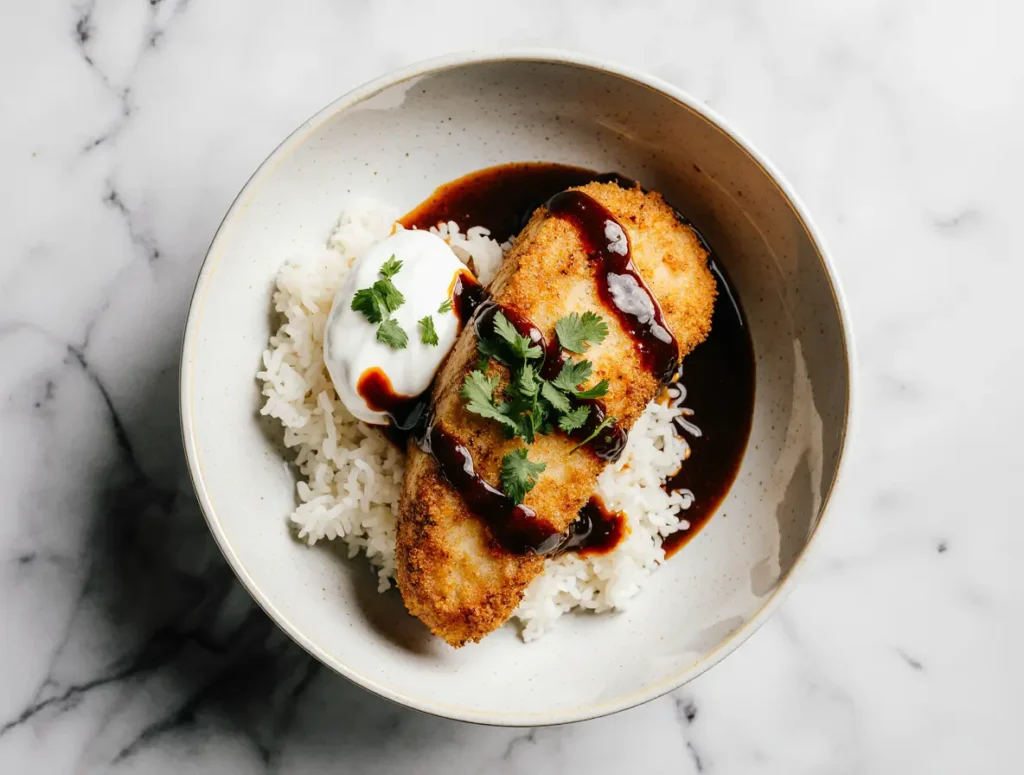
Finally, it’s time for assembly, which is my favorite part! I slice the cooked chicken into thin strips. Then, I add the cooked rice to individual bowls as the base. I top the rice with slices of refreshing cucumber, creamy avocado, the crispy chicken strips, some tangy pickled ginger, a sprinkle of fresh green onions, and a few pieces of nori. To finish, I spoon over a generous amount of the spicy mayo and drizzle with the reserved tamari/soy sauce marinade. Each bowl is a masterpiece of flavor and texture!
Ultimate Japanese Katsu Bowls with Crispy Chicken
Ingredients
Equipment
Method
- I start by grabbing a medium bowl, and into it, I combine 2/3 cup tamari/soy sauce, the fragrant sesame oil, sweet honey, fresh grated ginger, vibrant green onion, 1 teaspoon of sesame seeds, and a pinch of chili flakes. This creates my flavorful marinade. Then, I place the chicken in a separate bowl and pour over about 3-4 tablespoons of this incredible sauce, making sure to save the rest for serving later. I let the chicken sit and soak up all those flavors for at least 10 minutes. This short marinating time really makes a difference in the final taste!
- Next, I get my crispy coating ready. In a shallow bowl, I combine the Panko breadcrumbs with the remaining 3 tablespoons of sesame seeds. I then take each piece of marinated chicken and dredge both sides through the Panko mixture. This is where my pro-tip comes in: I really press down, using my fist to pound the crumbs firmly into the chicken. This ensures maximum adhesion and a truly irresistible crust when cooked. After coating, I transfer the chicken to a plate, ready for cooking.
- Now for the sizzle! I heat a few tablespoons of oil in a large skillet over medium-high heat. A little pro-tip here: I make sure the oil is shimmering before I add the chicken, as this helps achieve that beautiful golden-brown crispness. I add the chicken and cook it until it’s perfectly golden brown, which usually takes about 3-4 minutes per side. Once cooked, I transfer the Katsu to a cutting board. Don’t worry about cleaning the pan; I then add the frozen edamame directly to the same skillet and cook until thawed, which takes just a few minutes. I add 2 tablespoons of tamari/soy sauce to the edamame, cook for another minute to let the flavors meld, then remove it from the heat.
- While the chicken rests and the edamame cooks, I quickly whip up the Spicy Mayo. In a small bowl, I combine the olive oil mayo, sriracha (I adjust the amount to my preferred spice level!), soy sauce or tamari, and honey. I whisk everything together until it’s smooth and beautifully creamy. It’s so simple, but this sauce is a game-changer for the bowls!
- Finally, it’s time for assembly, which is my favorite part! I slice the cooked chicken into thin strips. Then, I add the cooked rice to individual bowls as the base. I top the rice with slices of refreshing cucumber, creamy avocado, the crispy chicken strips, some tangy pickled ginger, a sprinkle of fresh green onions, and a few pieces of nori. To finish, I spoon over a generous amount of the spicy mayo and drizzle with the reserved tamari/soy sauce marinade. Each bowl is a masterpiece of flavor and texture!
Notes
Troubleshooting Common Katsu Issues
I know cooking can sometimes present little challenges, but don’t worry, I’m here to help you troubleshoot any common Katsu issues you might encounter! I’ve definitely learned a few tricks over the years.
If your Katsu ends up soggy instead of crispy, I recommend checking your oil temperature; it might not have been hot enough. Also, ensure you don’t overcrowd the pan, as this can lower the oil temperature and steam the chicken instead of frying it. For uneven cooking, make sure your chicken cutlets are pounded to an even thickness before breading. If your Katsu tastes bland, don’t be shy with the seasoning in the marinade, and be sure to serve it with plenty of that delicious spicy mayo and reserved sauce! Finally, if your Panko is falling off, revisit Step 2 and make sure you’re pressing those breadcrumbs firmly into the chicken.
Storage & Reheating Tips for Crispy Leftovers
I love having leftovers, but preserving the crispiness of Katsu is key! To keep your Japanese Katsu Bowls delicious, I recommend storing the components separately. I place the cooled chicken Katsu in an airtight container, keeping it separate from the rice, sauces, and fresh toppings. This helps prevent the Katsu from getting soggy.
For reheating, I find the oven or an air fryer works best to revive that crispy texture. I preheat my oven to 375°F (190°C) and bake the Katsu for about 10-15 minutes, or until heated through and re-crisped. In an air fryer, I typically cook it at 375°F (190°C) for about 5-8 minutes, flipping halfway. I always reheat the rice separately, often with a splash of water and covered in the microwave, and then reassemble my bowl with fresh toppings and sauce.
Frequently Asked Questions about Japanese Katsu Bowls
I get asked lots of questions about Japanese Katsu Bowls, so I’ve gathered some of the most common ones here to help you out!
Can Katsu be made ahead? You can definitely prep the chicken ahead! I recommend breading the chicken cutlets and storing them, uncooked, on a plate covered with plastic wrap in the fridge for up to a day. Then, just fry them up when you’re ready to eat for maximum crispiness.
How do I air fry Katsu? As I mentioned, I preheat my air fryer to 375°F (190°C), lightly spray the breaded Katsu with cooking oil, and cook for about 10-15 minutes, flipping halfway, until it’s golden and crispy. Cooking times can vary, so I always keep an eye on it.
What equipment do I need? For this recipe, you really just need a large skillet, a few bowls for marinading and breading, and a sharp knife for slicing the chicken and toppings. A good rice cooker is helpful for perfect rice, but a pot on the stove works just as well.
Can I batch cook Katsu? Absolutely! I often double or triple the recipe if I’m feeding a crowd or want leftovers. Just make sure not to overcrowd your pan when frying. You can also fry all the Katsu and keep it warm in a low oven while you prepare the rest of the bowls.
Conclusion
I truly hope you feel inspired and ready to create your very own Japanese Katsu Bowls at home. There’s something so incredibly satisfying about making a meal that feels special, yet is so approachable. I promise you, the aroma of that crispy chicken frying and the vibrant colors of your assembled bowl will bring such joy to your kitchen.
I can’t wait to hear how your Katsu Bowls turn out! What are your favorite toppings? Do you have a question I didn’t cover? Please, share your thoughts and culinary creations in the comments below! I love connecting with you and seeing what you’re cooking up. Happy cooking, my friends!