
Wonderful S’mores Sushi Recipe: No Campfire Needed

There’s something truly magical about s’mores, isn’t there? The ooey-gooey marshmallows, the melty chocolate, and the crisp graham crackers; it’s a flavor combination that instantly transports me back to happy memories. But let’s be honest, not every day is a campfire day, and sometimes I just crave that classic taste without all the fuss. That’s exactly why I dreamed up this incredible s’mores sushi recipe!
This unique and delightful treat brings all those beloved s’mores flavors to your table without needing a single flame. It’s an easy, fun, and surprisingly elegant dessert that’s perfect for parties, playdates, or just a cozy night in. Get ready to impress everyone with this no-campfire-needed s’mores sushi recipe. I know you’ll love it! The total prep and chill time for this delightful creation is about 1.5 to 2 hours.
Table of Contents
Why You’ll Adore This S’mores Sushi Recipe
I truly believe this s’mores sushi recipe will become one of your go-to desserts, and for good reason! Here’s what makes it so special:
- No Campfire Required: Enjoy classic s’mores flavors anytime, anywhere, without the smoke or fire. It’s perfect for indoor fun!
- Party Perfect & Less Mess: These easy to portion and serve sushi rolls are ideal for gatherings. Say goodbye to sticky fingers from individual s’mores.
- Kid-Friendly Fun: Little hands can easily help with pressing, sprinkling, and rolling. It’s a delightful activity that turns into a delicious treat.
- A Unique Dessert Twist: Surprise your guests with this creative and unexpected presentation. It looks fancy but is incredibly simple to make.
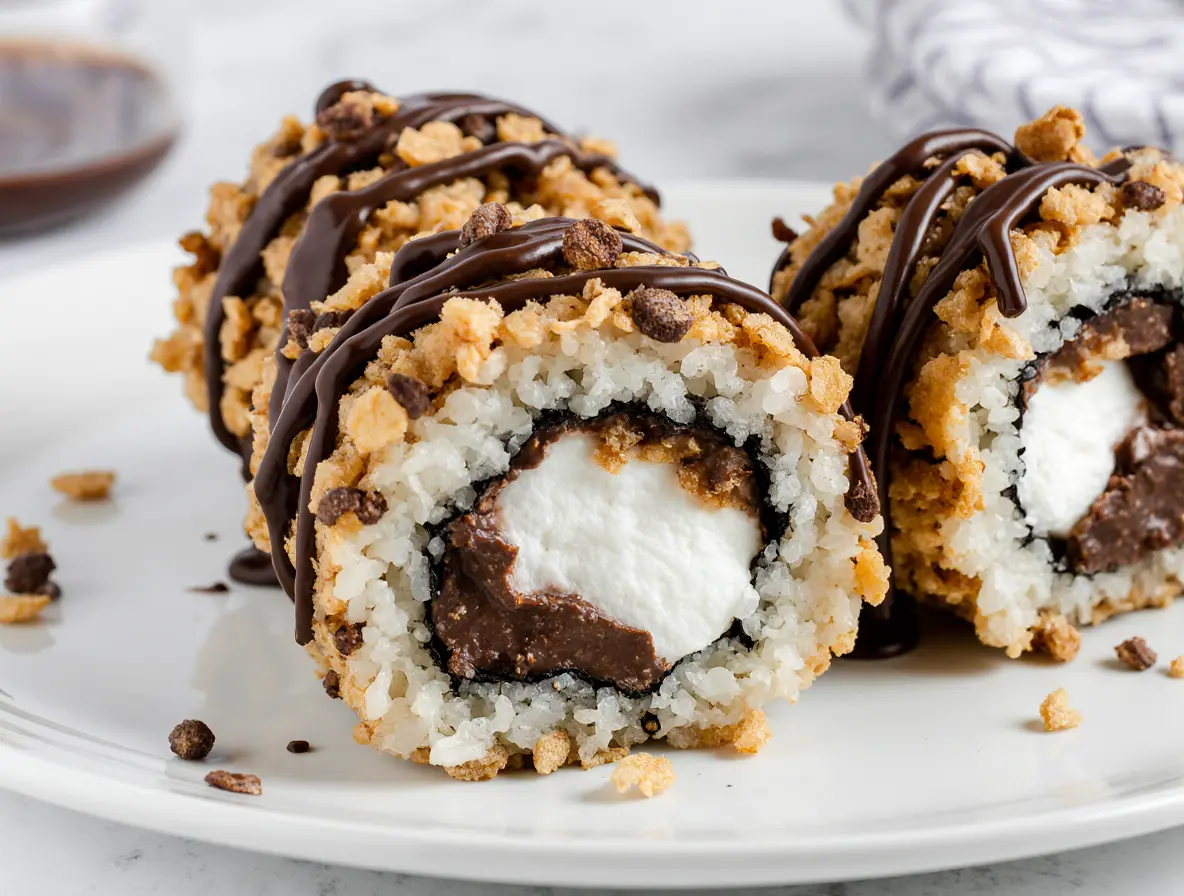
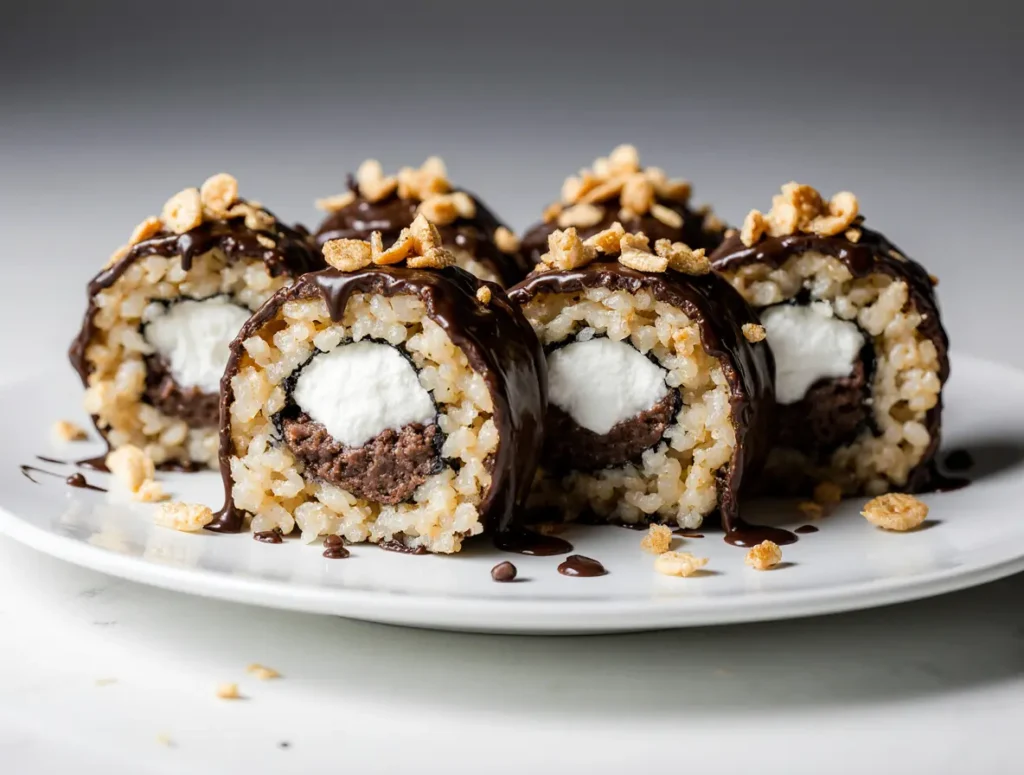
- All the S’mores Flavor: Every bite delivers that nostalgic blend of toasted marshmallow, rich chocolate, and crunchy graham cracker. It’s truly irresistible.
What You’ll Need: S’mores Sushi Ingredients
Here are the simple ingredients I use for this incredible s’mores sushi recipe. I’ve added a few notes to help you pick the best ones!
- 1/4 cup butter: I find unsalted butter works best, but salted is fine too if that’s what you have on hand. It adds a richness to the base.
- 10 oz. mini marshmallows: Fresh marshmallows melt much more smoothly. Look for soft, pliable ones for the best results in your cereal base.
- 5 cups Rice Krispies cereal: This classic cereal gives us that perfect crispy texture. Make sure it’s fresh for maximum crunch!
- 2 cups marshmallow Fluff: This is my secret weapon for the gooey layer. It’s super easy to spread and adds an extra layer of marshmallow goodness.
- 1 cup crushed graham crackers: I love using classic honey graham crackers for their authentic flavor. You can crush them yourself or buy pre-crushed.
- 1 cup semisweet chocolate chips, melted (plus more for serving): I recommend a good quality brand for a smooth, rich melt. Don’t skimp on this part, it makes a difference!
Step-by-Step: Crafting Your S’mores Sushi
I’m going to guide you through each step to make sure your s’mores sushi recipe turns out perfectly. Don’t worry, it’s really quite simple!
Prepare the Base
This is where our crispy foundation comes to life.
- Line a baking sheet with wax paper and grease with cooking spray. I like to make sure the wax paper extends a little over the edges; it helps with rolling later!
- In a pot over low heat, melt the butter. Add mini marshmallows and stir until melted. Keep the heat low and stir constantly to prevent the marshmallows from burning.
- Remove from heat and stir in Rice Krispies cereal until well coated. Work quickly here, as the marshmallow mixture can start to set.
Add Toppings
Now for all the delicious s’mores layers!
- Spread marshmallow Fluff over the cereal base. I find it easiest to use an offset spatula for this, and you can lightly grease it with cooking spray to prevent sticking.
- Sprinkle crushed graham crackers over the Fluff, pressing them slightly. Don’t be afraid to gently press them down so they adhere to the marshmallow layer.
- Pour melted chocolate over the graham crackers, smoothing with a spatula. For a super smooth layer, make sure your chocolate is fully melted and warm.
Roll and Chill
This is where the “sushi” magic happens!
- Cut the layered sheet in half lengthwise. I use a sharp knife for a clean cut down the middle.
- Roll up each half from the long side, like sushi rolls. The wax paper will help you roll it tightly. I encourage you to roll it as snugly as you can.
Serve
The moment we’ve all been waiting for: enjoying your creation!
- Slice into sushi roll pieces. For the cleanest cuts, I recommend wiping your knife with a warm, damp cloth between each slice.
- Serve with additional melted chocolate for dipping. A small bowl of extra melted chocolate on the side makes for a lovely presentation and allows for even more chocolatey goodness.
Wonderful S’mores Sushi Recipe: No Campfire Needed
Ingredients
Equipment
Method
- Line a baking sheet with wax paper and grease with cooking spray. I like to make sure the wax paper extends a little over the edges; it helps with rolling later!
- In a pot over low heat, melt the butter. Add mini marshmallows and stir until melted. Keep the heat low and stir constantly to prevent the marshmallows from burning.
- Remove from heat and stir in Rice Krispies cereal until well coated. Work quickly here, as the marshmallow mixture can start to set.
- Spread marshmallow Fluff over the cereal base. I find it easiest to use an offset spatula for this, and you can lightly grease it with cooking spray to prevent sticking.
- Sprinkle crushed graham crackers over the Fluff, pressing them slightly. Don’t be afraid to gently press them down so they adhere to the marshmallow layer.
- Pour melted chocolate over the graham crackers, smoothing with a spatula. For a super smooth layer, make sure your chocolate is fully melted and warm.
- Cut the layered sheet in half lengthwise. I use a sharp knife for a clean cut down the middle.
- Roll up each half from the long side, like sushi rolls. The wax paper will help you roll it tightly. I encourage you to roll it as snugly as you can.
- Slice into sushi roll pieces. For the cleanest cuts, I recommend wiping your knife with a warm, damp cloth between each slice.
- Serve with additional melted chocolate for dipping. A small bowl of extra melted chocolate on the side makes for a lovely presentation and allows for even more chocolatey goodness.
Notes
Pro Tips for Perfect S’mores Sushi Rolls
I want your s’mores sushi to be absolutely perfect, so here are a few extra tips I’ve picked up along the way!
- Preventing Stickiness: When pressing the cereal mixture or spreading the fluff, lightly grease your hands or spatula with cooking spray. This makes everything much easier to handle.
- Clean Slices Every Time: For those beautiful, neat sushi rolls, make sure your creation is thoroughly chilled. Before slicing, run your sharp knife under hot water and wipe it clean; this helps prevent sticking and gives you crisp edges.
- Troubleshooting Texture: If your cereal mixture feels too hard to press, it might have cooled too much. A quick 10-second zap in the microwave can sometimes soften it slightly. If it’s too soft, let it cool a little longer.
- Smooth Chocolate Layer: Ensure your chocolate is fully melted and completely smooth before pouring. If it’s too thick, you can add a tiny bit of coconut oil or vegetable oil (1/2 teaspoon) to thin it out for easier spreading.
S’mores Sushi Substitutions and Creative Variations
I love to get creative in the kitchen, and this s’mores sushi recipe is fantastic for experimenting! Here are some ideas for substitutions and variations to make it your own:
| Ingredient/Component | Substitution Idea | Variation Idea | Notes |
|---|---|---|---|
| Rice Krispies Cereal | Chex, Cheerios, Cocoa Krispies | Add a mix of cereals | These will change the texture and flavor, offering a new experience. |
| Marshmallows | Vegan marshmallows | Roasted marshmallows (before melting) | Adjust melting time for vegan options; roasting adds a lovely smoky flavor. |
| Chocolate Chips | Milk chocolate, dark chocolate, white chocolate | Swirl with peanut butter or caramel | Different chocolates affect sweetness and intensity. |
| Toppings | Mini M&Ms, sprinkles, chopped nuts, shredded coconut, dried fruit, crushed cookies (Oreos) | Add a drizzle of caramel or white chocolate | Get creative with colors and textures for a personalized touch! |
| Base Flavor | Add a touch of vanilla extract to marshmallow mix | Infuse with a pinch of cinnamon | These additions enhance the overall flavor profile. |
Make-Ahead & Storage Instructions for S’mores Sushi
One of the best things about this s’mores sushi recipe is how well it holds up, making it perfect for preparing in advance!
I typically store my s’mores sushi in an airtight container at room temperature for up to 2 days, or in the refrigerator for up to 5 days. If refrigerating, let it come to room temperature for about 15-20 minutes before serving for the best texture.
For longer storage, you can freeze individual slices in an airtight container or freezer bag for up to 1 month. Just thaw them at room temperature for about an hour before enjoying! Always ensure they are in an airtight container to keep them fresh and prevent any sticking.
Creative Ways to Serve Your S’mores Sushi
Serving these delightful rolls is almost as fun as making them! I always think about how to make them look extra special, especially for gatherings.
Try arranging your s’mores sushi pieces artfully on a large platter. You can place them around small bowls of extra melted chocolate, warm caramel sauce, or even a raspberry coulis for dipping. I sometimes serve them alongside a scoop of vanilla bean ice cream; the contrast is just wonderful! For a festive touch, sprinkle a few mini chocolate chips or a dusting of cocoa powder over the platter. They also make a fantastic addition to a larger dessert board, sitting proudly amongst cookies, fruit, and other sweet treats.
Frequently Asked Questions About S’mores Sushi
I often get questions about new recipes, and I’m always happy to help! Here are some common queries about this s’mores sushi recipe:
- Do I need a sushi mat to make S’mores Sushi? No, you absolutely do not! I use the wax paper (or parchment paper) lining the baking sheet to help with the rolling process. It works perfectly.
- How sticky will this s’mores sushi recipe be? It will be a bit sticky, as s’mores naturally are! However, by using cooking spray on your hands and tools, and ensuring a good chill time, you can minimize the mess significantly.
- Can kids help make S’mores Sushi? Yes, definitely! This is a fantastic recipe for kids to get involved in. They can help crush graham crackers, sprinkle toppings, and even assist with the rolling (with adult supervision, of course!).
- Why is it called s’mores sushi? It’s called s’mores sushi because of its rolled, sliced, and bite-sized presentation, which resembles traditional sushi rolls. It’s a fun, playful name that highlights its unique form!
- Can I make this ahead for a party? Absolutely! This recipe is perfect for making ahead. I recommend making it the day before your party and storing it in the refrigerator. Just slice and serve when your guests arrive!
Nutrition Information (Estimate)
Please note that this section provides estimated nutritional information per serving for this s’mores sushi recipe. This is an estimate and may vary based on the specific brands and quantities of ingredients I use. For general dietary guidance, health organizations recommend limiting calories from added sugars. The American Heart Association provides specific daily limits for adults.
Conclusion
I’m so excited for you to try this s’mores sushi recipe! It’s truly one of my favorite ways to enjoy those classic, nostalgic s’mores flavors without the need for a campfire. This recipe brings so much joy and ease to dessert making; it’s perfect for any occasion, big or small.
I hope you have as much fun making and eating these as I do. Please, when you whip up your own batch of s’mores sushi, come back and tell me all about it in the comments below! What are your favorite variations? Do you have any questions? Share your beautiful creations on social media using #whatwillcooksushismores. I can’t wait to see what you make!