
Irresistible Japanese Chicken Yakitori Recipe

Oh, I just love the feeling of bringing a little piece of Japan right into my kitchen! There’s something so incredibly satisfying about recreating those authentic, delicious flavors I dream about. Today, I’m absolutely thrilled to share a recipe that truly captures that magic: my irresistible Japanese Chicken Yakitori.
It’s a dish that might seem fancy, but I promise you, it’s wonderfully approachable, full of incredible taste, and brings the joy of an Izakaya experience directly to your home. Get ready for tender chicken and sweet-savory tare that will have everyone asking for more.
Table of Contents
Why You’ll Love Making This Japanese Chicken Yakitori at Home
I truly believe this specific Japanese Chicken Yakitori recipe will become a new favorite in your kitchen. Here are just a few reasons why I think you’ll adore it:
- Authentic Izakaya Experience: I’ve crafted this recipe to bring those genuine, smoky, sweet-savory flavors of a true Japanese Izakaya experience right to your dining table. You’ll feel like you’re in Japan!
- Surprisingly Simple: Despite its gourmet taste, I promise the steps are straightforward. With my clear guidance, anyone can master the art of homemade Yakitori, no special skills required.
- Tender, Flavorful Chicken: I choose boneless, skinless chicken thighs for this recipe because they stay incredibly juicy and absorb the delicious tare sauce beautifully, ensuring every bite is moist and flavorful.
- Customizable to Your Taste: While I adore the classic chicken and negi combination, this recipe is a fantastic base for experimenting. You can easily adapt it with other vegetables or even different cuts of meat to make it uniquely yours.
Essential Ingredients for Authentic Japanese Chicken Yakitori
I always say, good ingredients are the foundation of good food. For our delightful Japanese Chicken Yakitori, here’s exactly what you’ll need:
- ½ cup soy sauce (use gluten-free soy sauce for GF)
- ¾ cup chicken broth (½ cup + ¼ cup from recipe instructions)
- 1 tbsp apple cider vinegar
- ¼ cup water
- 2 tsp brown sugar (packed and leveled off)
- 2 Tokyo negi (naga negi; long green onion) (or 9 green onions)
- 1 lb boneless, skinless chicken thighs (at room temperature)
- neutral oil (for brushing the wire rack)
- shichimi togarashi (Japanese seven spice) (optional; for a spicy kick)
Ingredient Spotlight: Why Each Component Matters
Every ingredient in this recipe plays a crucial role in creating the authentic flavors of Japanese Chicken Yakitori. I love understanding why each component is chosen.
I always reach for boneless, skinless chicken thighs because they are simply the best for Yakitori. They have a higher fat content than chicken breast, which means they stay incredibly moist and tender during grilling. This fat also renders beautifully, infusing the chicken with even more flavor.
The Tokyo negi, or long green onions, are another star here. When grilled, they sweeten and soften, offering a lovely contrast to the savory chicken. The distinct sweetness and mild onion flavor are truly unique to negi. For the tare sauce, soy sauce provides the essential umami and salinity, while chicken broth adds a rich savory base.
The apple cider vinegar introduces a subtle tang that balances the sweetness of the brown sugar, which also helps create that beautiful, glossy caramelized glaze we all love. Finally, a touch of water ensures our tare has the perfect consistency for basting.
Smart Substitutions & Helpful Variations
I know sometimes you might not have every single ingredient on hand, or you might have dietary considerations. That’s perfectly fine! I want to make sure you can still enjoy this recipe.
| Ingredient | Substitution/Variation | Notes |
|---|---|---|
| Soy Sauce | Gluten-Free Soy Sauce | For those following a gluten-free diet, I simply swap out regular soy sauce for its gluten-free counterpart to ensure the tare is safe for you. The flavor remains wonderfully similar. |
| Tokyo Negi (Long Green Onion) | 9 regular Green Onions | If Tokyo negi are hard to find, I find that 9 regular green onions work beautifully. They offer a similar pungent-sweet flavor profile when grilled. |
How to Make Japanese Chicken Yakitori: Step-by-Step Guide
Making Japanese Chicken Yakitori at home is a wonderfully rewarding experience, and I’m here to guide you through every step! Let’s get cooking.
Preparing Your Chicken & Negi
First things first, I gather all my ingredients. For this recipe, I use teppogushi or “gun skewers” that have a flat tab for a handle. You can buy them at Japanese markets or on Amazon. If you can‘t find them, you can use regular bamboo skewers. I always soak 10–12 5-inch bamboo skewers in water for 30 minutes (or at least 10 minutes while I’m prepping the ingredients). This prevents them from burning on the grill.
Next, I tackle the negi. I separate the green part of 2 Tokyo negi (naga negi; long green onion) from the white and light green parts. Then, I cut the white and light green parts into 1¼-inch (3-cm) pieces. I also cut the green parts in half crosswise. For the chicken, I cut the 1 lb boneless, skinless chicken thighs into similar 1¼-inch (3-cm) pieces, making sure they are as uniform as possible for even cooking.
Skewering for Success
Now comes the fun part: assembling our skewers! I alternate pieces of chicken and negi onto my prepared skewers. I like to fold the chicken pieces in half or in an S-shape before threading them on, which helps them stay secure and cook evenly. I aim for about three chicken pieces and two negi pieces per skewer, creating a lovely visual and ensuring a good balance of flavors in each bite. I make sure not to pack the pieces too tightly; leaving a little space allows the heat to circulate and gives us that perfect char.
Grilling Your Japanese Chicken Yakitori to Perfection
This is where the magic happens! I preheat my grill (or broiler, or pan) to a medium-high heat. If I’m using a wire rack, I brush it lightly with neutral oil to prevent sticking. I place the skewers on the hot grill, making sure not to overcrowd it. I cook them for about 2-3 minutes per side, turning them until all sides are lightly browned and the chicken is nearly cooked through.
My goal is to get a nice char without burning. If I’m using a broiler, I keep them about 6 inches from the heat source and flip every few minutes. For pan-frying, I make sure the chicken pieces get good contact with the pan.
The Perfect Baste: Applying Your Tare
Once the chicken is mostly cooked and has a lovely golden-brown char, it’s time for our wonderful tare sauce. I generously brush the skewers with the homemade tare sauce. I continue to cook them, flipping and basting every minute or so, until the sauce has caramelized and created a beautiful, glossy glaze on the chicken and negi.
This typically takes another 3-5 minutes. I’m careful not to apply the sauce too early, as the sugar can burn, but also not too late, as we want that lovely sticky glaze. If I have any leftover tare, I often serve it on the side for dipping. If you like a little heat, this is when I sprinkle some shichimi togarashi (Japanese seven spice) over the hot Yakitori.
Irresistible Japanese Chicken Yakitori Recipe
Ingredients
Equipment
Method
- Gather all the ingredients. For this recipe, you can use teppogushi or “gun skewers” with a flat tab handle, or regular 5-inch bamboo skewers. Soak bamboo skewers in water for 30 minutes (or at least 10 minutes while prepping ingredients) to prevent them from burning.
- Separate the green part of 2 Tokyo negi (long green onion) from the white and light green parts. Cut the white and light green parts into 1¼-inch (3-cm) pieces. Cut the green parts in half crosswise.
- Cut 1 lb boneless, skinless chicken thighs into similar 1¼-inch (3-cm) pieces, ensuring they are as uniform as possible for even cooking.
- In a small saucepan, combine ½ cup soy sauce, ½ cup chicken broth, 1 tbsp apple cider vinegar, ¼ cup chicken broth, ¼ cup water, 2 tsp brown sugar, and the green part of the Tokyo negi.
- Bring the mixture to a boil over high heat. Once boiling, reduce the heat to low and simmer, uncovered, until the sauce reduces to one-third of its original volume (about 30 minutes). Let it cool completely; the sauce will thicken with a glossy shine as it cools.
- Optional: To store the sauce, remove the green onion and pour it into a mason jar. It keeps well in the refrigerator for up to 2–3 months.
- If you plan to serve your yakitori with extra sauce, reserve one-third of the cooled sauce in a small bowl for final basting just before serving. Use this reserved sauce with a clean brush only after the chicken is fully cooked to prevent cross-contamination.
- On a flat work surface, fold a slice of chicken in half. Holding a skewer at a 45-degree angle, pierce the side of the folded meat. Then, tilt the skewer parallel to the work surface and thread it all the way through, positioning the chicken next to the handle.
- Next, add a piece of Tokyo negi perpendicularly, packing it snugly next to the chicken piece.
- Add another piece of chicken, then another piece of Tokyo negi.
- End with a final piece of chicken. Each 5-inch skewer will hold about 3 chicken slices and 2 Tokyo negi pieces. Make sure not to pack the pieces too tightly, leaving a little space for air circulation and even heat distribution.
- Line a baking sheet with aluminum foil for easy cleanup. Place an oven-safe wire rack on top and grease its grate with neutral oil to keep the chicken from sticking.
- Place the skewers on the wire rack in two rows, with the handles resting along the edges of the baking sheet. Cover the top and bottom of the handles with folded strips of aluminum foil to prevent burning.
- Turn on the broiler to High (550ºF/288ºC) with a rack placed on the middle position of the oven, about 8 inches (20 cm) away from the heating element. Wait until the heating elements are hot, about 3–5 minutes. Then, place the skewers under the broiler and broil for 6 minutes.
- After 6 minutes, brush the meat and Tokyo negi generously with the yakitori tare sauce.
- Flip the skewers carefully with a pair of tongs. Brush the sauce on the other side. Continue to broil for 3–4 minutes to caramelize the sauce.
- Finally, flip one more time (this is the presentation side). Baste with additional sauce, then broil for an additional 1–2 minutes until beautifully glazed. Remove the baking sheet from the oven.
- Heat a large frying pan over medium heat. When hot, add about 1 Tbsp neutral oil. Place the skewers in the pan in a single layer (you may need to cook in batches). Cook until both sides are brown, about 5 minutes per side.
- Cover and cook on low heat for 2–3 minutes. Add the tare sauce to the pan and cook until the skewers are well coated on both sides. Remove from the heat.
- Transfer the skewers to a serving plate, presentation side up. Optionally, with a clean brush, baste the top of the chicken skewers with the reserved sauce.
- Serve immediately with shichimi togarashi (Japanese seven spice) for an optional spicy kick, and enjoy!
- Store any cooled leftovers in an airtight container in the refrigerator for up to 3 days or in the freezer for up to a month (remove chicken and negi from skewers before freezing).
Notes
Troubleshooting Common Yakitori Problems
Even seasoned cooks like me sometimes run into little snags. Don’t worry if your Yakitori isn’t perfect on the first try; I’m here to help you troubleshoot common issues!
If your chicken turns out dry, it might be that your grill was too hot, or you cooked it for too long. Chicken thighs are quite forgiving, but overcooking can still happen. I always recommend using a meat thermometer to ensure the internal temperature reaches 165°F (74°C) and then removing it from the heat right away. Another tip is to make sure your chicken pieces are cut uniformly so they cook at the same rate.
If your sauce is burning, you’ve likely applied the tare too early in the grilling process. The sugar in the tare can caramelize quickly and then burn if exposed to high heat for too long. My trick is to apply the tare only towards the end of cooking, after the chicken is mostly done, and then baste frequently, turning the skewers every minute or so until that beautiful glaze forms.
Finally, sticking skewers can be frustrating. For bamboo skewers, remember my advice to soak them thoroughly for at least 30 minutes. If I’m using a metal grill grate or broiler pan, I always make sure it’s clean and I brush it lightly with neutral oil before placing the skewers down. A properly preheated surface also helps prevent sticking.
Serving Suggestions & Perfect Pairings
Making Japanese Chicken Yakitori at home is a treat, and I love creating a full Izakaya-style meal to go with it! It elevates the entire dining experience.
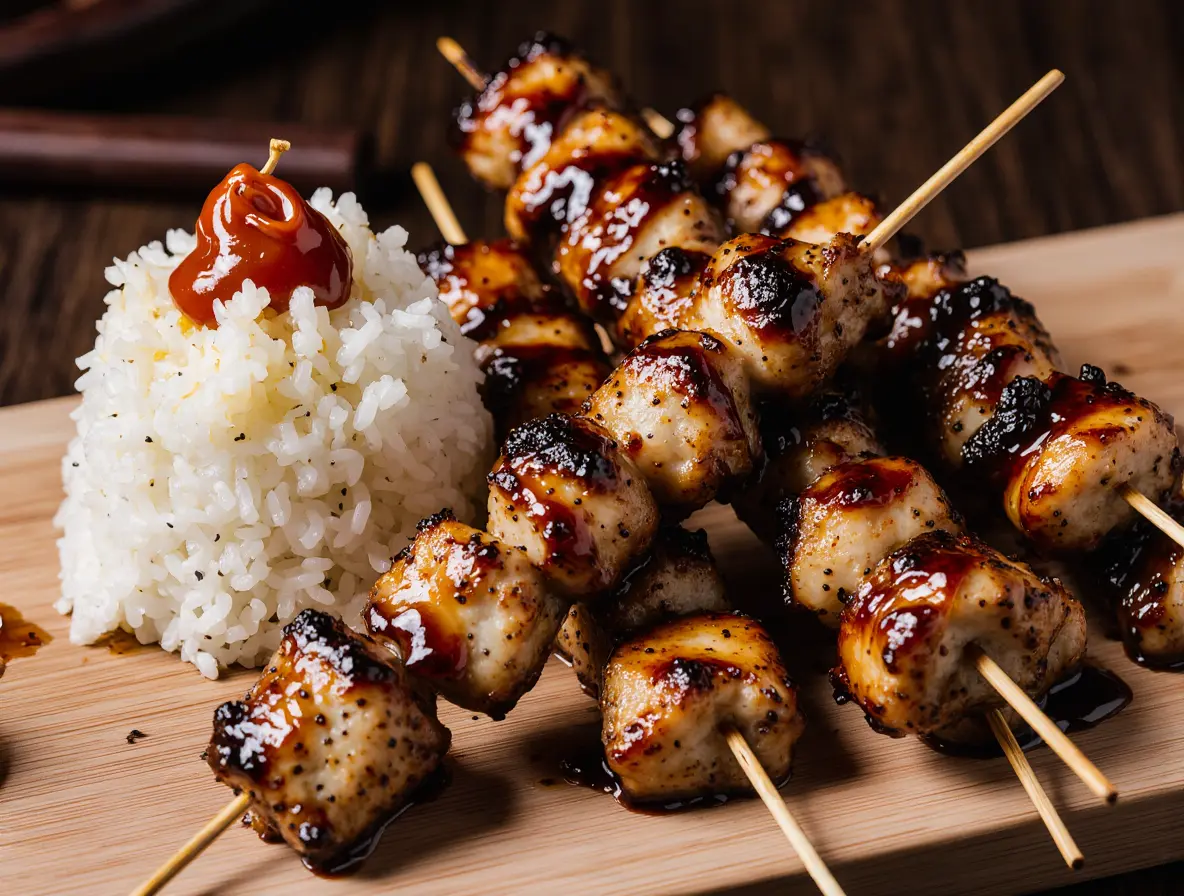
I always serve my Yakitori alongside a bowl of fluffy steamed rice; it’s the perfect canvas for soaking up any extra tare sauce. For a fresh contrast, a simple Japanese-style cucumber salad or some quick-pickled daikon radishes would be absolutely delicious. These add a lovely crunch and tanginess that cuts through the richness of the chicken.
To complete the experience, I suggest pairing your Yakitori with a crisp, dry Japanese sake, such as a Junmai or Honjozo, which complements the savory flavors beautifully. If you prefer beer, a cold Japanese lager like Sapporo, Asahi, or Kirin is always a fantastic choice, offering a refreshing cleanse for your palate between bites.
Storing & Reheating Your Delicious Yakitori
I know life can be busy, and sometimes you have leftovers (if you’re lucky!). Properly storing and reheating your Japanese Chicken Yakitori is key to enjoying it again.
Once cooled, I store any leftover Yakitori in an airtight container in the refrigerator for up to 2-3 days. When I’m ready to reheat, I find the best method is in an oven or air fryer. I preheat my oven to 350°F (175°C) or my air fryer to 325°F (160°C). I place the skewers on a baking sheet or in the air fryer basket and heat for about 5-8 minutes, or until just warmed through.
This helps to crisp up the chicken again without drying it out. If you have any leftover tare sauce, a quick brush before reheating can also help revitalize the flavors and moisture. I try to avoid the microwave if possible, as it can sometimes make the chicken a bit rubbery.
Frequently Asked Questions (FAQ)
I often get questions about making Yakitori at home, so I’ve compiled some common ones to help you out!
Can I prepare Japanese Chicken Yakitori ahead of time? A: You can definitely do some prep ahead! I like to cut the chicken and negi, and even skewer them, a few hours in advance. I store the assembled skewers in the refrigerator, covered, until I’m ready to grill. I also prepare the tare sauce days in advance; it keeps well in the fridge.
Can I use different parts of the chicken? A: Absolutely! While I prefer thighs for their juiciness, you can use chicken breast (just be careful not to overcook it, as it dries out faster), or even explore other traditional Yakitori cuts like chicken skin or meatballs. Just adjust grilling times accordingly.
How can I make this recipe gluten-free? A: It’s simple! I just make sure to use a certified gluten-free soy sauce for the tare. All other ingredients in this recipe are naturally gluten-free.
What if I don’t have apple cider vinegar? A: While I love the subtle tang apple cider vinegar brings, if you don’t have it, you can substitute it with rice vinegar. It will offer a similar mild acidity to balance the sweetness of the tare.
Can I freeze cooked Yakitori? A: While it’s best enjoyed fresh, you can freeze cooked Yakitori. I remove the chicken and negi from the skewers and freeze them in an airtight container for up to 1 month. To reheat, I thaw them overnight in the fridge and then warm them in the oven or air fryer as described above.
Conclusion: Your Japanese Chicken Yakitori Journey Awaits!
I truly hope you feel inspired to embark on your own Japanese Chicken Yakitori adventure right in your kitchen. There’s such a unique joy in recreating these incredible flavors at home, and I promise you, the smiles around your table will make every moment worthwhile. This recipe isn’t just about food; it’s about bringing people together, sharing a delightful experience, and discovering new culinary passions.
I can’t wait to hear how your Yakitori turns out! Please, leave a comment below with your experiences, ask any questions you might have, or even share photos of your delicious creations. Your cooking journey brings me so much joy, and I love becoming a part of what will cook in your home today!