
Fantastic Thanksgiving Stuffing Balls Recipe

I’m often asked about gluten-free options, and I always want to make sure everyone can enjoy my recipes. For a gluten-free version, I simply substitute the regular bread with 6 cups of your favorite gluten-free bread, cut into 1/2 inch cubes. Make sure it’s day-old or lightly toasted to prevent it from getting soggy. I keep all other ingredients the same to maintain the familiar holiday flavor.
If you’re looking for a vegetarian option, it’s incredibly easy! I simply use vegetable broth instead of chicken broth. All the other ingredients in my recipe are already plant-based or vegetarian-friendly, making it a simple swap for a delicious side dish.
For those following a vegan diet, a few mindful substitutions will allow you to enjoy these too. I swap the butter for a good quality plant-based butter alternative and use vegetable broth. For the egg, I use a ‘flax egg’ (1 tablespoon ground flaxseed mixed with 3 tablespoons water, allowed to sit for 5 minutes) or a commercial egg replacer to bind everything together. It works wonderfully to keep the balls intact!
Table of Contents
Alternative Cooking Methods for Crispy Thanksgiving Stuffing Balls
While I love the golden crispiness achieved in the oven, sometimes I like to experiment with other methods to get that perfect crunch. You absolutely have options for cooking your Thanksgiving Stuffing Balls.
If you own an air fryer, it’s fantastic for an extra-crispy exterior! I preheat my air fryer to 375°F (190°C) and cook the balls in a single layer, without overcrowding, for about 10-15 minutes. I make sure to flip them halfway through until they are deeply golden and crunchy. Another method I sometimes use is pan-frying. After forming the balls, I heat a little butter or oil in a skillet over medium heat and pan-fry them, turning occasionally, until they are browned and heated through. This gives a lovely, rich crust.
Fantastic Thanksgiving Stuffing Balls Recipe
Ingredients
Equipment
Method
- Preheat oven to 400 degrees Fahrenheit and prepare a large baking sheet with parchment paper or use a greased muffin tin. In a large sauté pan, melt butter over medium heat. Add in chopped celery and shallots. Stir about 2-3 minutes until softened. Turn off heat and allow it to cool for a few minutes.
- In a large bowl, whisk together egg, poultry seasoning, parsley, broth, salt and pepper, then add butter mixture. Add bread cubes and use your hands to mash it all together. If mixture seems too moist, add more bread. If it seems too dry, add more broth. Pack the stuffing mixture tightly in your hands and form into roughly 2-1/2 inch balls – they should hold together well if you have enough moisture.
- Place balls on the prepared baking sheet and bake at 400°F for 20 minutes until lightly browned and crunchy on the outside. Store in the fridge for 2-3 days or in a freezer safe container for up to 2-3 months.
Notes
Troubleshooting Common Thanksgiving Stuffing Ball Issues
I know it can be frustrating when a recipe doesn’t turn out as expected. I’ve been there! Here are solutions to some common issues you might encounter with Thanksgiving Stuffing Balls.
- “Why are my stuffing balls falling apart?” This is usually a moisture issue. If your mixture is too dry, the bread cubes won’t bind together properly. I recommend adding a tablespoon of broth at a time and mashing it in until the mixture holds its shape when squeezed. Sometimes, a slightly larger egg can also provide better binding.
- “Why are my stuffing balls dry?” A dry stuffing ball often means there wasn’t enough liquid in the mixture, or the bread was extremely stale and absorbed too much. Next time, try adding a bit more broth than the recipe calls for, or if you’re making them again, you can gently warm them with a splash of broth before serving.
- “How do I get crispy stuffing balls?” Achieving that desirable crisp exterior requires a few things. First, make sure your oven is preheated to the correct temperature. Second, don’t overcrowd the baking sheet; allow space for air to circulate around each ball. Lastly, using day-old bread is crucial, as it toasts up beautifully without becoming soggy.
Make-Ahead & Storage for Your Thanksgiving Stuffing Balls
One of the things I love most about these Thanksgiving Stuffing Balls is how wonderfully they lend themselves to make-ahead prep. This truly helps ease the holiday rush for me.
To prepare them ahead, I form the balls as directed but don’t bake them. I arrange the uncooked balls on a baking sheet, cover them tightly with plastic wrap, and refrigerate them for up to 2 days. When I’m ready to bake, I just place them directly into the preheated oven. If I want to freeze them uncooked, I flash freeze them on a baking sheet until solid, then transfer them to a freezer-safe bag or container for up to 2-3 months. I bake them from frozen, adding about 5-10 minutes to the baking time.
If I’m storing cooked Thanksgiving Stuffing Balls, I let them cool completely before transferring them to an airtight container. They’ll keep beautifully in the fridge for 2-3 days. For longer storage, I freeze the cooked balls on a baking sheet until solid, then move them to a freezer-safe container for up to 2-3 months.
Reheating Your Thanksgiving Stuffing Balls
I often find myself with leftover Thanksgiving Stuffing Balls, and reheating them properly means they taste just as good as the first time. I want to make sure they stay wonderfully crisp and moist.
If I’m reheating from the fridge, I typically place the cooked stuffing balls on a baking sheet and warm them in a 350°F (175°C) oven for about 10-15 minutes, or until they reach an internal temperature of 165°F and lightly re-crisped. Sometimes I’ll spray them with a little cooking oil first. If I’m reheating from the freezer, I bake them directly from frozen in a 350°F (175°C) oven for 20-30 minutes, or until they are hot in the center and crispy on the outside.
Don’t Waste a Bite! Repurposing Leftover Stuffing into New Balls
I am a big believer in reducing food waste, especially after a big holiday meal! If I have leftover stuffing from a casserole, it’s absolutely perfect for transforming into these delicious stuffing balls. This is a brilliant way to give your leftovers a whole new life.
I simply take the already cooked and cooled stuffing, and if it’s too dry, I’ll mix in a tablespoon or two of vegetable or chicken broth to help it bind. Then, I use my hands to pack and form it into roughly 2-1/2 inch balls, just like I would with the fresh mixture. I can bake these at 400°F for about 10-15 minutes until they’re warmed through and crispy, or even pan-fry them for a quick reheat and crisp. Sometimes, I even crumble in a bit of leftover roasted turkey or mashed potatoes if I have them, adding an extra layer of flavor and texture to these delightful repurposed balls.
Serving Suggestions & Presentation for Thanksgiving Stuffing Balls
I love how versatile these Thanksgiving Stuffing Balls are, not just in flavor, but also in how I can present them. They’re so much fun to serve!
Beyond being a classic side dish for your Thanksgiving turkey, I sometimes serve them as appetizers, like my butternut squash and apple bruschetta with a small dipping bowl of cranberry sauce. To make them look extra festive, I always garnish them with a sprinkle of fresh Italian flat leaf parsley before serving. They also pair beautifully with wonderful one-pan maple glazed chicken, pork loin, or even a simple weeknight meal when I want something comforting. I like arranging them artfully on a large platter, perhaps alongside other colorful roasted vegetables, like those in a pot pie.
Frequently Asked Questions About Thanksgiving Stuffing Balls
I often get questions about specific aspects of my recipes, so I’ve compiled some common inquiries about Thanksgiving Stuffing Balls to help you out!
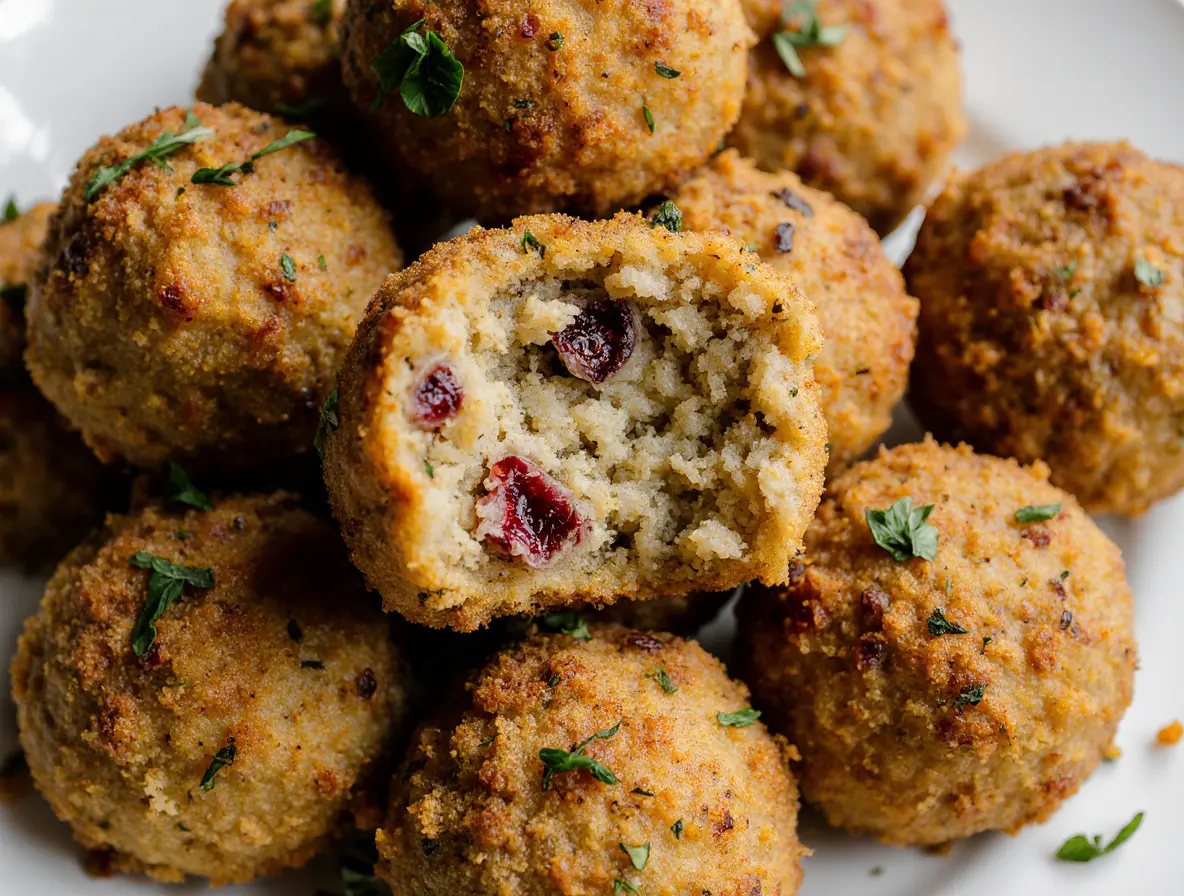
What are Thanksgiving stuffing balls made of? Thanksgiving stuffing balls are made from a mixture of day-old bread cubes, sautéed celery and shallots, an egg for binding, poultry seasoning, fresh Italian flat leaf parsley, broth, salt, and pepper. I love how these simple ingredients create such a rich flavor.
Can I use gluten-free bread? Absolutely! I simply substitute the regular bread with 6 cups of your favorite gluten-free bread, cut into 1/2 inch cubes. Make sure it’s day-old or lightly toasted to prevent it from getting soggy.
How do I keep stuffing balls from falling apart? The key is to ensure the moisture level is just right. If your mixture feels too dry, I add a tablespoon of broth at a time until it holds together firmly when you squeeze it in your hand. The egg also acts as a crucial binding agent.
Can you prepare Thanksgiving stuffing balls the night before? Yes, I often do! I prepare and form the balls the night before, then cover them tightly and refrigerate. I bake them directly from the fridge on Thanksgiving Day, which saves me so much time.
How many stuffing balls per person? I generally plan for 2-3 Thanksgiving Stuffing Balls per person, especially if I’m serving other sides. If it’s the star of the show, or if I know my guests have big appetites, I might account for 3-4.
Is it better to freeze them cooked or uncooked? I find both methods work well! Freezing them uncooked and baking from frozen often yields a slightly fresher texture upon baking. However, freezing them cooked is incredibly convenient for quick reheating. I’ve included instructions for both in my make-ahead section.
Conclusion
I truly hope you feel inspired to try these Thanksgiving Stuffing Balls for your next holiday gathering, or even just for a special weeknight dinner. I’ve found so much joy in transforming a traditional dish into these delightful, individual portions. They bring all the comforting flavors I adore with an extra touch of elegance and convenience.
I would absolutely love to hear from you! Please leave a comment below and let me know your favorite stuffing variation, or if you have any lingering questions. And of course, I’d be thrilled if you shared your holiday creations with me! Happy cooking!