
Ultimate Japanese Cotton Cheesecake Cupcakes

When I first started whatwillcook.com, I often found myself wondering, “What will I cook?” I was always searching for that perfect recipe, something that felt special but wasn’t overly complicated. That’s how I discovered the magic of Japanese Cotton Cheesecake Cupcakes, and I’m so excited to share my guide to fluffy perfection with you today! These little cloud-like treats are a delightful journey into a world of airy, melt-in-your-mouth goodness. You can achieve this exquisite dessert at home in around 1 hour and 30 minutes, making these Japanese Cotton Cheesecake Cupcakes a truly rewarding baking project.
Table of Contents
Why You’ll Love Baking These Japanese Cotton Cheesecake Cupcakes
I know you’ll fall in love with making these delightful treats for so many reasons.
- Perfect Portion Control: These individual Japanese Cotton Cheesecake Cupcakes are ideal for serving, offering a perfectly portioned dessert every time. No need for slicing and struggling with a whole cake!
- Elegant Presentation: Their delicate appearance makes them an elegant addition to any gathering, from a casual tea party to a special celebration. I find they always impress my guests.
- Make-Ahead Convenience: You can prepare these cupcakes in advance, making entertaining a breeze. They taste wonderful chilled, giving you flexibility.
- Joyful Baking Experience: There’s immense satisfaction in achieving such a light, fluffy, and perfectly jiggly dessert right in your own kitchen. It truly is a joyful baking project.
Essential Ingredients for Fluffy Perfection
Every ingredient plays a crucial role in creating the signature light and airy texture of these Japanese Cotton Cheesecake Cupcakes. Here’s what you’ll need, and why each one is important:
- 4 oz (115g) cream cheese, softened: This forms the rich, creamy base of our cheesecake, providing that essential tangy flavor. Softened cream cheese ensures a smooth batter without lumps.
- 2 tablespoons unsalted butter: Butter adds richness and helps create a tender crumb in the cupcakes. Unsalted butter allows me to control the overall saltiness of the recipe.
- ¼ cup (60ml) whole milk: Milk helps to loosen the batter and contribute to the moist, smooth texture. Whole milk offers the best richness.
- 3 large eggs, separated: Separating the eggs is key! Yolks provide richness and structure, while whipped egg whites are folded in to create the incredible lift and airy texture.
- ½ teaspoon vanilla extract: Vanilla adds a lovely depth of flavor and warmth, complementing the subtle tang of the cream cheese. I never skip this!
- ½ teaspoon lemon juice: A touch of lemon juice brightens the flavors and also helps stabilize the egg whites when whipping them. It’s a small but mighty addition.
- ¼ cup (30g) cake flour (or twice-sifted all-purpose flour): Cake flour has a lower protein content, which is essential for a super tender and delicate crumb. If you don’t have it, twice-sifting all-purpose flour helps replicate that lightness.
- 1 tablespoon cornstarch: Cornstarch works with the flour to provide stability without adding too much gluten, ensuring the cupcakes hold their shape beautifully while remaining tender.
- ¼ cup (50g) granulated sugar: Sugar sweetens the cupcakes and also helps to stabilize the egg whites during whipping, contributing to their volume.
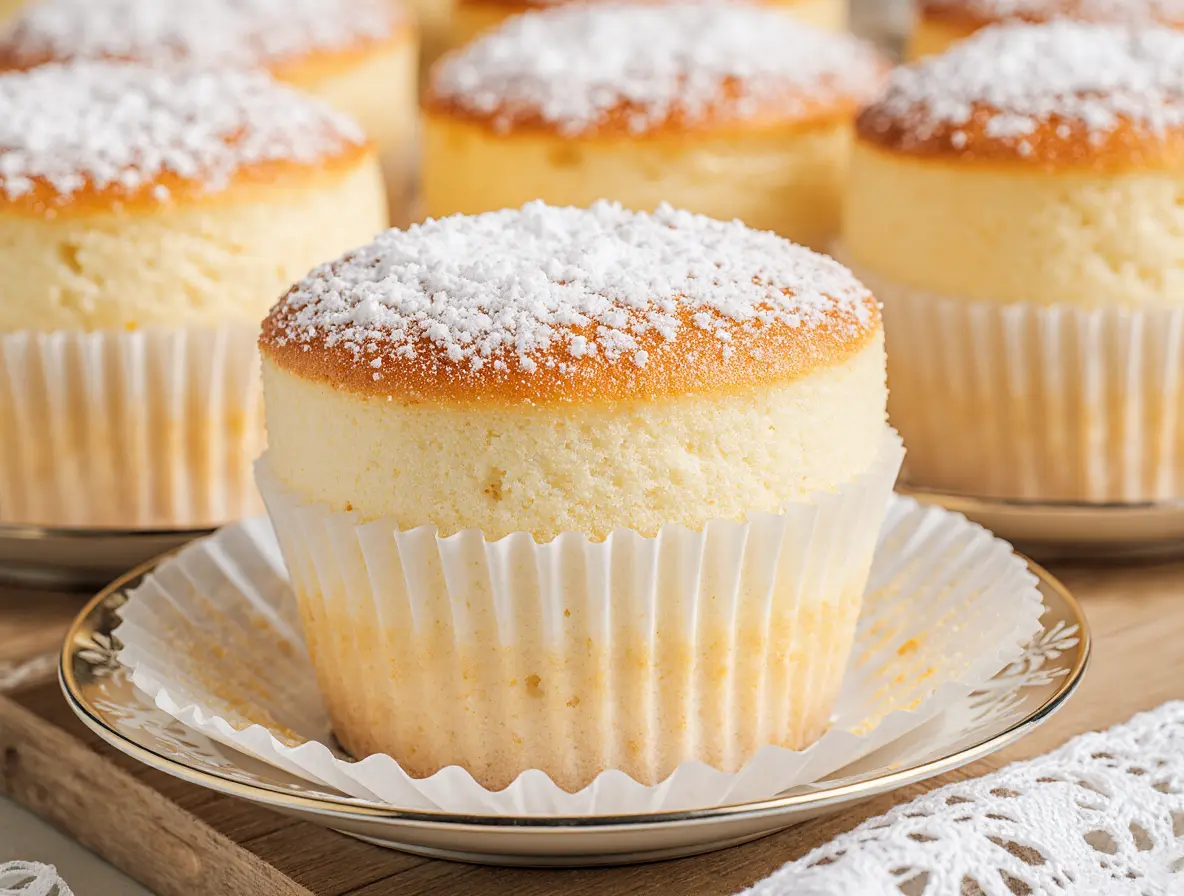
- Powdered sugar for dusting (optional): This is a simple, elegant finish that adds a touch of sweetness and beauty.
- Fresh berries for garnish (optional): Berries provide a lovely pop of color and a fresh, tart counterpoint to the creamy sweetness of the cupcakes.
How to Make Japanese Cotton Cheesecake Cupcakes: Step-by-Step Guide
Making these Japanese Cotton Cheesecake Cupcakes is a gentle process that rewards patience. Follow these steps carefully, and you’ll have perfectly fluffy treats!
Step 1: Prepare Your Oven and Water Bath
Preheat your oven to 320°F (160°C). Line a muffin tin with 12 paper cupcake liners and place it inside a deep roasting pan. The water bath you’ll create later helps keep the texture ultra-smooth and prevents cracks. I always make sure my muffin tin is secure in the roasting pan, leaving enough space to pour the hot water in without spilling.
Step 2: Melt the Creamy Base
In a small saucepan over low heat, melt the cream cheese, butter, and milk together, stirring constantly until smooth and silky. Letting it melt slowly over low heat is important to prevent scorching and ensure a perfectly smooth, lump-free mixture. Let it cool slightly before moving on; you don’t want to cook your egg yolks!
Step 3: Create the Flavor Foundation
In a mixing bowl, whisk the egg yolks with vanilla extract and lemon juice. Thoroughly whisking at this stage prevents lumps later and ensures even flavor distribution, setting the stage for a uniform batter. Slowly incorporate the cooled cream cheese mixture until you get a uniform batter.
Step 4: Sift in the Dry Ingredients
Sift in the cake flour and cornstarch. Gently whisk until smooth and lump-free. Reiterate that this step ensures the batter stays light and airy, preventing a dense final product by distributing the dry ingredients evenly without overmixing.
Step 5: Whip the Egg Whites
Using a clean, dry bowl, beat the egg whites on medium speed until foamy. Gradually add the sugar, continuing to beat until soft peaks form—when you lift your beaters, the peaks should droop slightly at the tips. This stage is critical; soft peaks mean the egg whites are airy but still flexible, which is perfect for folding and creating that signature rise. Avoid overbeating, as stiff peaks can lead to a dry cupcake.
Step 6: Fold with Patience
Add a third of the meringue to the yolk mixture and fold gently. Then incorporate the rest in two batches. Be slow and careful—this is what gives the cupcakes their signature fluffiness. This delicate folding technique is the secret to the cupcakes’ soufflé-like texture, so take your time and fold without deflating the precious air you’ve built into the meringue.
Step 7: Pour and Bake
Spoon the batter into the cupcake liners, filling them about three-quarters full. Carefully pour hot water into the roasting pan until it reaches halfway up the muffin tin. Be extra careful not to splash water into the cupcake liners. Bake for 20–25 minutes, or until the tops are golden and the cakes slightly jiggle. A golden top and a gentle jiggle in the center are key indicators of doneness.
Step 8: Cool Gracefully
Turn off the oven and crack the door open. Let the cupcakes rest inside for 5 minutes, then cool in the pan for another 10 minutes before transferring to a rack. This slow cooling process is incredibly important to prevent shrinking and cracking, helping the cupcakes retain their beautiful, delicate structure. It’s a vital step for achieving that perfect finish.
Step 9: Add Finishing Touches
Dust with powdered sugar or top with fresh berries. Serve warm for a pillowy texture or chill for a creamy bite. I love how versatile these cupcakes are; a simple dusting makes them elegant, while fresh berries add a burst of color and flavor.
Ultimate Japanese Cotton Cheesecake Cupcakes
Ingredients
Equipment
Method
- Preheat your oven to 320°F (160°C). Line a muffin tin with 12 paper cupcake liners and place it inside a deep roasting pan. The water bath you’ll create later helps keep the texture ultra-smooth and prevents cracks. I always make sure my muffin tin is secure in the roasting pan, leaving enough space to pour the hot water in without spilling.
- In a small saucepan over low heat, melt the cream cheese, butter, and milk together, stirring constantly until smooth and silky. Letting it melt slowly over low heat is important to prevent scorching and ensure a perfectly smooth, lump-free mixture. Let it cool slightly before moving on; you don’t want to cook your egg yolks!
- In a mixing bowl, whisk the egg yolks with vanilla extract and lemon juice. Thoroughly whisking at this stage prevents lumps later and ensures even flavor distribution, setting the stage for a uniform batter. Slowly incorporate the cooled cream cheese mixture until you get a uniform batter.
- Sift in the cake flour and cornstarch. Gently whisk until smooth and lump-free. Reiterate that this step ensures the batter stays light and airy, preventing a dense final product by distributing the dry ingredients evenly without overmixing.
- Using a clean, dry bowl, beat the egg whites on medium speed until foamy. Gradually add the sugar, continuing to beat until soft peaks form—when you lift your beaters, the peaks should droop slightly at the tips. This stage is critical; soft peaks mean the egg whites are airy but still flexible, which is perfect for folding and creating that signature rise. Avoid overbeating, as stiff peaks can lead to a dry cupcake.
- Add a third of the meringue to the yolk mixture and fold gently. Then incorporate the rest in two batches. Be slow and careful—this is what gives the cupcakes their signature fluffiness. This delicate folding technique is the secret to the cupcakes’ soufflé-like texture, so take your time and fold without deflating the precious air you’ve built into the meringue.
- Spoon the batter into the cupcake liners, filling them about three-quarters full. Carefully pour hot water into the roasting pan until it reaches halfway up the muffin tin. Be extra careful not to splash water into the cupcake liners. Bake for 20–25 minutes, or until the tops are golden and the cakes slightly jiggle. A golden top and a gentle jiggle in the center are key indicators of doneness.
- Turn off the oven and crack the door open. Let the cupcakes rest inside for 5 minutes, then cool in the pan for another 10 minutes before transferring to a rack. This slow cooling process is incredibly important to prevent shrinking and cracking, helping the cupcakes retain their beautiful, delicate structure. It’s a vital step for achieving that perfect finish.
- Dust with powdered sugar or top with fresh berries. Serve warm for a pillowy texture or chill for a creamy bite. I love how versatile these cupcakes are; a simple dusting makes them elegant, while fresh berries add a burst of color and flavor.
Notes
Maya’s Expert Tips for Japanese Cotton Cheesecake Cupcakes Success
I’ve made these Japanese Cotton Cheesecake Cupcakes countless times, and I’ve picked up a few insider secrets I want to share with you!
- Room Temperature Ingredients are Non-Negotiable: Make sure your cream cheese, butter, milk, and eggs are all at room temperature. This ensures they emulsify smoothly, creating a uniform, lump-free batter. It truly makes a difference.
- Accuracy with an Oven Thermometer: Oven temperatures can be tricky. I always use an oven thermometer to verify my oven is truly at 320°F (160°C). Precise temperature control is critical for these delicate cheesecakes to prevent cracking or uneven baking.
- Gentle Hand, Light Touch: When mixing and especially when folding in the egg whites, be as gentle as possible. Overmixing can deflate the precious air, leading to a denser cupcake. Think of it as caressing the batter, not beating it.
- The Meringue is Key: Your egg whites should be whipped to soft peaks, as described in the instructions. If they’re under-whipped, they won’t provide enough lift. If they’re over-whipped, they can be difficult to fold in and make the cupcakes dry. Practice makes perfect here!
- Patience During Cooling: Don’t rush the cooling process. The slow transition from hot oven to room temperature is vital for preventing the cupcakes from shrinking or cracking. Resisting the urge to open the oven door too soon will pay off!
Substitutions for Japanese Cotton Cheesecake Cupcakes
I want this recipe to be as accessible as possible, so here are some common substitutions you can try:
| Ingredient | Substitution | Impact on Texture/Flavor |
|---|---|---|
| Cake Flour | All-purpose flour + cornstarch (1:1 ratio) | Using all-purpose flour might result in a slightly less tender crumb due to higher protein, but adding cornstarch helps to mimic cake flour’s softness. |
| Whole Milk | Plant-based milk (e.g., almond, soy, oat milk) | Most plant-based milks will work well. The texture might be slightly less rich, but the overall lightness will still be present. Choose an unsweetened variety. |
| Granulated Sugar | Fine caster sugar | Caster sugar dissolves more quickly, which can be beneficial when whipping egg whites, but granulated sugar works perfectly fine. No significant flavor change. |
Flavor Variations & Creative Toppings
While these Japanese Cotton Cheesecake Cupcakes are perfect on their own, it’s always fun to experiment with flavor variations and creative toppings! If you’re looking to explore more delightful recipes from Japanese cuisine, consider trying a savory dish like the Ultimate Japanese Katsu Bowls, or perhaps even an amazing spicy salmon sushi bake for a different culinary adventure.
- Matcha Swirl: Before folding in the last third of the meringue, gently swirl in 1-2 teaspoons of matcha powder that has been mixed with a tablespoon of hot water to create a paste. This adds an earthy, slightly bitter note.
- Chocolate Marbled: Melt 1 ounce of dark chocolate and swirl it into a small portion of the finished batter before spooning into liners. Use a skewer to create elegant chocolate marbled Japanese Cotton Cheesecake Cupcakes.
- Citrus Zest: Add ½ teaspoon of finely grated orange or lime zest to the cream cheese mixture for an extra bright, fragrant note.
- Lightly Sweetened Whipped Cream: A dollop of fresh, lightly sweetened whipped cream is a classic and elegant topping that complements the delicate nature of the cupcakes beautifully.
- Fruit Compotes: A small spoonful of homemade berry compote, apricot preserves, or a tart cherry sauce adds a wonderful fruity burst.
- Chocolate Ganache Drizzle: For a touch of indulgence, a delicate drizzle of chocolate ganache can be piped over the cooled cupcakes.
Serving and Gifting Your Delightful Cupcakes
These delicate Japanese Cotton Cheesecake Cupcakes deserve to be presented beautifully, whether you’re serving them at home or giving them as gifts.
For serving, arrange them on a pretty tiered stand or a simple platter, perhaps with a sprinkle of powdered sugar and a few fresh berries around the base. Their elegant simplicity speaks volumes. You can serve them slightly warm for that ultimate pillowy texture, or chilled for a creamier, denser bite.
If you’re gifting them, individual cupcake boxes or small gift boxes lined with tissue paper are perfect. Tie a simple ribbon around the box, and maybe include a small handwritten tag. These make such thoughtful and unique presents for birthdays, holidays, or just to brighten someone’s day.
Storage and Freezing Instructions
To keep your Japanese Cotton Cheesecake Cupcakes fresh and delicious, proper storage is key.
- Refrigeration: Store any leftover cupcakes in an airtight container in the refrigerator. They will maintain their delicate texture and flavor for up to 3-4 days. I love enjoying them chilled, as their creaminess becomes more pronounced.
- Freezing: Yes, you can freeze these! Once completely cooled, wrap each cupcake individually in plastic wrap, then place them in an airtight freezer-safe bag or container. They can be frozen for up to 1 month.
- Thawing: To thaw, simply transfer the frozen cupcakes to the refrigerator overnight. You can also let them come to room temperature for about an hour before serving for a softer texture. Avoid thawing them in the microwave, as it can affect their delicate structure.
Frequently Asked Questions (FAQs)
Can I make Japanese Cotton Cheesecake Cupcakes ahead of time?
Absolutely! These cupcakes actually taste wonderful chilled. You can bake them a day or two in advance and store them in an airtight container in the refrigerator until you’re ready to serve.
What if I don’t have cake flour?
No problem! You can easily make a substitute for cake flour. For every cup of all-purpose flour, remove 2 tablespoons and replace them with 2 tablespoons of cornstarch. Sift this mixture twice to ensure it’s well combined and airy.
Can I freeze these cupcakes?
Yes, you can! Once your cupcakes are completely cooled, wrap each one individually in plastic wrap, then store them in an airtight, freezer-safe container for up to one month. Thaw them in the refrigerator overnight before serving.
Why did my cupcakes crack on top?
Cracking usually happens if the oven temperature is too high, or if the water bath isn’t providing enough humidity. An oven thermometer helps ensure accurate temperature, and always make sure your water bath is adequately filled to prevent cracks.
Conclusion
I hope this guide has filled you with confidence and excitement to bake your very own Japanese Cotton Cheesecake Cupcakes! There’s such a unique joy in creating something so light, airy, and utterly delicious right in your kitchen. This recipe truly transforms a simple dessert into an elegant, melt-in-your-mouth experience that I know you’ll adore.
Don’t be intimidated by the delicate nature of these treats; I promise, with a little patience and my tips, you’ll achieve fluffy perfection. I would absolutely love to hear about your baking adventures, so please leave a comment below with your experiences, any questions you might have, or even your own creative topping ideas. Happy baking, my friends!