
Amazing Melt In Your Mouth Chicken Breast

I know the feeling: you’re staring at boneless, skinless chicken breasts, desperately wanting them to be juicy and tender, not dry and rubbery. It’s a common kitchen challenge, but I’m here to tell you that achieving truly moist, fall-apart chicken doesn’t have to be a mystery. In fact, it can be incredibly easy and utterly delicious.
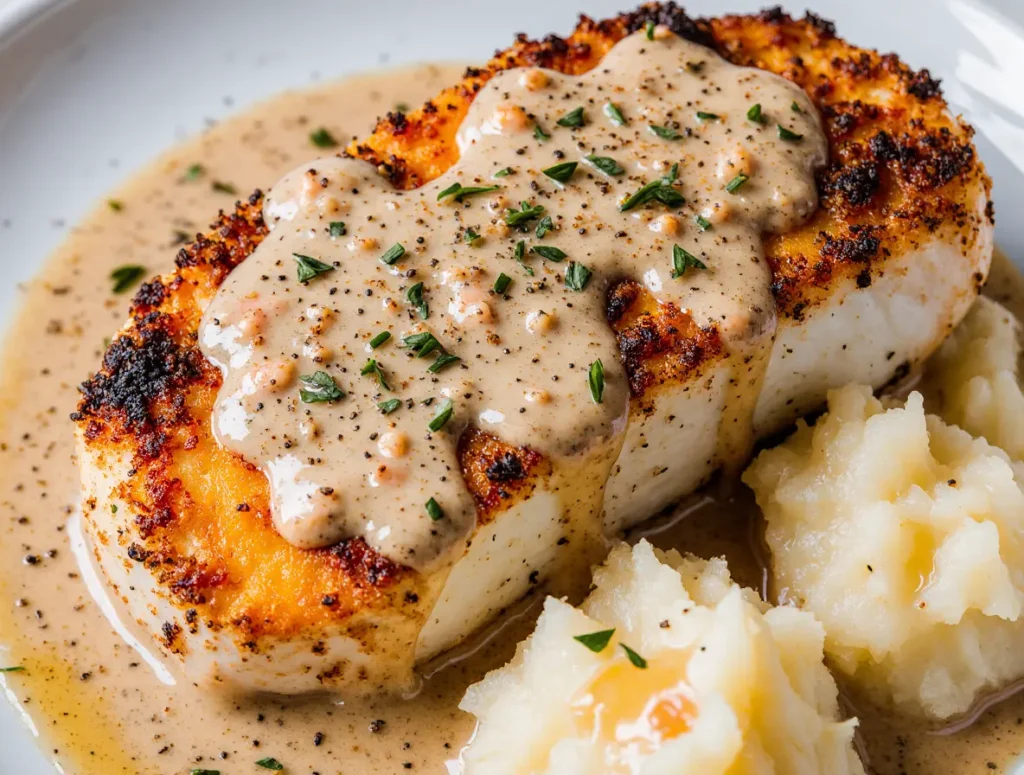
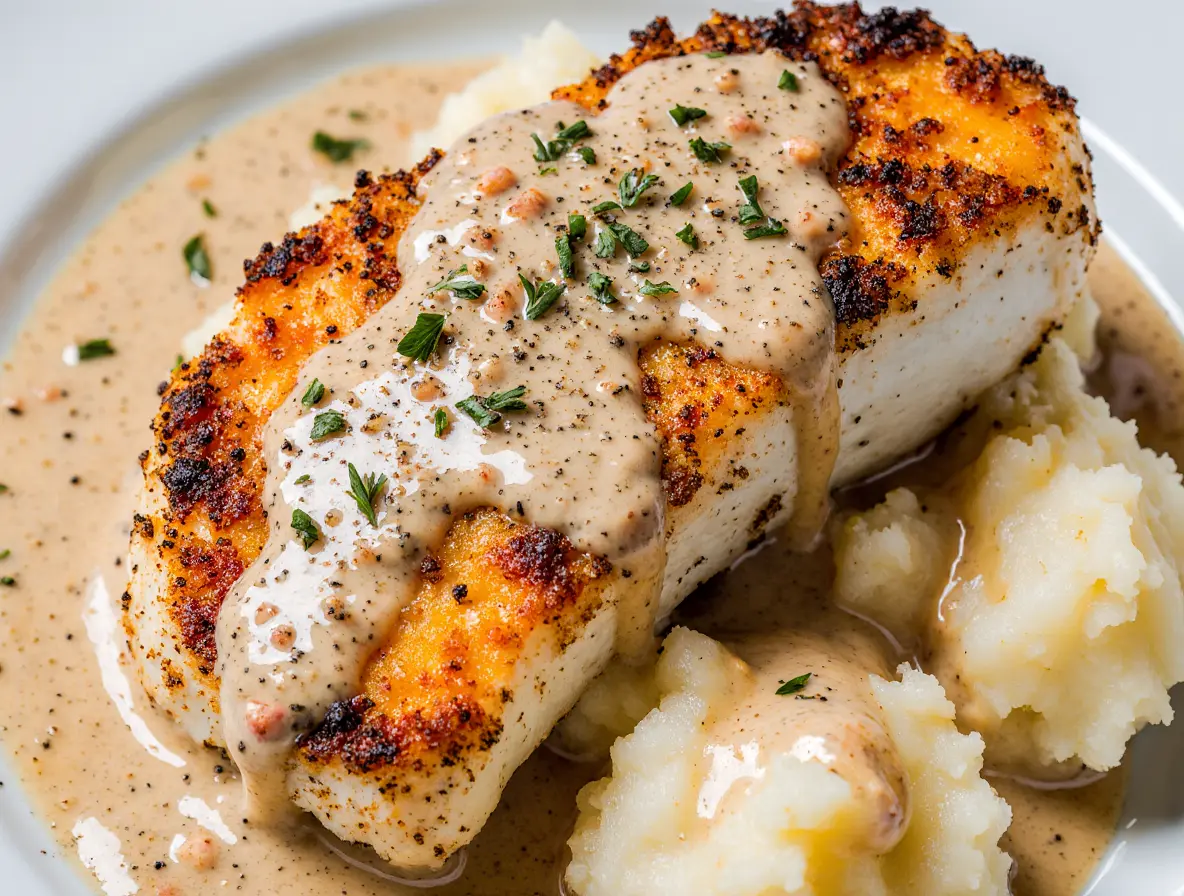
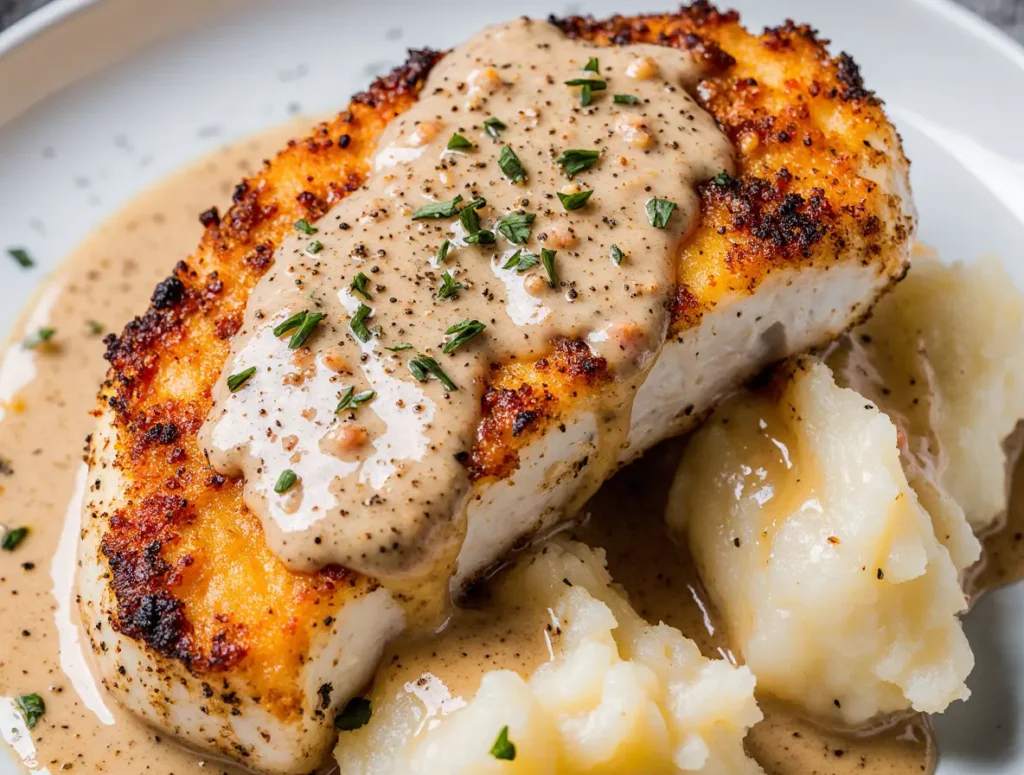
Today, I’m sharing my absolute favorite recipe for what I call “Melt In Your Mouth Chicken Breast.” It features a wonderfully creamy, flavorful coating that locks in moisture, ensuring every bite is as tender as can be. This recipe is quick to prepare, relies on simple ingredients, and delivers sensational results every time, making it perfect for your busiest weeknights.
Table of Contents
Why You’ll Love This Melt In Your Mouth Chicken Breast Recipe (And Why It Works!)
I genuinely believe this recipe will become a staple in your kitchen for so many reasons. It’s designed to make your life easier and your meals tastier, hitting all the marks for busy home cooks. For another equally delightful addition to your weeknight rotation, check out this quick easy black pepper chicken recipe. Here’s why I love it, and why it consistently delivers on its “melt in your mouth” promise:
- Incredibly Moist Every Time: I promise you, dry chicken will be a distant memory. This recipe ensures each breast stays wonderfully juicy from edge to edge.
- Simple, Accessible Ingredients: You likely have most of these ingredients in your pantry right now. I love recipes that don’t require a special trip to the store.
- Quick and Easy to Prepare: From mixing the coating to baking, this meal comes together with minimal fuss. It’s perfect for those evenings when time is not on your side. Another fantastic creamy chicken gnocchi weeknight meal is also available for busy cooks.
- Packs a Flavorful Punch: The rich, savory coating permeates the chicken, creating a dish that’s far from bland. It’s comforting and satisfying in every bite.
The secret to its incredible tenderness lies in the creamy coating. Ingredients like mayonnaise or Greek yogurt create a protective, flavorful layer over the chicken. This layer acts as a barrier, sealing in the chicken’s natural juices and preventing it from drying out during baking. It’s a simple trick that makes a huge difference, ensuring moisture and tenderness in every single piece of chicken.
Ingredients You’ll Need for the Best Melt In Your Mouth Chicken Breast
I’ve carefully selected these ingredients to work together, ensuring both flavor and that coveted “melt in your mouth” texture. Each one plays an important role in the success of this dish.
- 4 boneless chicken breast halves: These are the star of the show, providing a lean canvas for our flavorful coating. They are naturally quick-cooking, so ensuring they stay moist is key.
- 1 cup mayonnaise or 1 cup Greek yogurt: This is my secret weapon for tenderness. Both mayonnaise and Greek yogurt create a rich, creamy coating that locks in moisture and keeps the chicken incredibly juicy during baking. I love how they add a tangy depth of flavor, too.
- 1/2 cup parmesan cheese, freshly grated: Parmesan brings a wonderful salty, umami kick to the coating. Freshly grated is always best because it melts beautifully and has a superior flavor compared to pre-shredded varieties. If you’re a fan of cheesy chicken dishes, you’ll also love this amazing cheesy chicken crescent bake recipe.
- 1/2 teaspoon seasoning salt: A blend of savory spices, seasoning salt enhances the overall flavor of the chicken and ties all the other ingredients together. It’s a convenient way to add a lot of taste.
- 1/2 teaspoon ground black pepper: Just a touch of black pepper provides a subtle warmth and aroma, complementing the other seasonings without overpowering them.
- 1 teaspoon garlic powder: Garlic powder is a must-have for depth of flavor. It infuses the chicken with that classic savory garlic taste without the need for mincing fresh cloves.
How to Make Melt In Your Mouth Chicken Breast (Step-by-Step Oven Method)
I promise you, these steps are straightforward and designed for success. Follow them closely, and you’ll have perfectly tender, flavorful chicken ready in no time.
- In a medium bowl, I mix the mayonnaise or yogurt, parmesan cheese, seasoning salt, ground black pepper, and garlic powder until everything is thoroughly combined. I make sure there are no dry spots.
- I carefully pat my chicken breasts dry with paper towels. This simple step helps the coating adhere better and promotes a nicer crust. Then, I spread the prepared mixture generously over both sides of each chicken breast, ensuring they are fully coated. I place the coated chicken breasts in a baking dish, typically a 9×13 inch pan, arranging them in a single layer.
- I preheat my oven to 375°F (190°C). Once hot, I slide the baking dish into the oven and bake for 45 minutes. I always keep an eye on it, and the most important thing is to confirm the internal temperature reaches 165°F (74°C) with a meat thermometer. The coating should look beautifully golden brown and slightly bubbly when it’s ready.
- After removing the chicken from the oven, I loosely tent the baking dish with aluminum foil. I let the chicken rest for 5-10 minutes before slicing and serving. This resting period is crucial; it allows the juices to redistribute throughout the meat, guaranteeing the juiciest, most “melt in your mouth” results!
Amazing Melt In Your Mouth Chicken Breast
Ingredients
Equipment
Method
- In a medium bowl, I mix the mayonnaise or yogurt, parmesan cheese, seasoning salt, ground black pepper, and garlic powder until everything is thoroughly combined. I make sure there are no dry spots.
- I carefully pat my chicken breasts dry with paper towels. This simple step helps the coating adhere better and promotes a nicer crust. Then, I spread the prepared mixture generously over both sides of each chicken breast, ensuring they are fully coated. I place the coated chicken breasts in a baking dish, typically a 9×13 inch pan, arranging them in a single layer.
- I preheat my oven to 375°F (190°C). Once hot, I slide the baking dish into the oven and bake for 45 minutes. I always keep an eye on it, and the most important thing is to confirm the internal temperature reaches 165°F (74°C) with a meat thermometer. The coating should look beautifully golden brown and slightly bubbly when it’s ready.
- After removing the chicken from the oven, I loosely tent the baking dish with aluminum foil. I let the chicken rest for 5-10 minutes before slicing and serving. This resting period is crucial; it allows the juices to redistribute throughout the meat, guaranteeing the juiciest, most “melt in your mouth” results!
- I prepare the chicken breasts exactly as described for the oven method, coating them generously with the mayonnaise or yogurt mixture.
- I preheat my air fryer to 375°F (190°C) for about 5 minutes. Preheating helps ensure even cooking.
- I place the coated chicken breasts in the air fryer basket in a single layer, making sure not to overcrowd it. Depending on the size of your air fryer, you might need to cook them in batches.
- I air fry the chicken for 18-25 minutes, flipping them halfway through. The cooking time can vary based on the thickness of your chicken breasts and your specific air fryer model.
- I always use a meat thermometer to check for doneness, aiming for an internal temperature of 165°F (74°C). The coating should be golden and delicious.
- Just like with the oven method, I let the chicken rest for 5 minutes after cooking before slicing. This helps to keep it wonderfully juicy.
Notes
Maya’s Top Tips for Truly Tender Melt In Your Mouth Chicken Breast
I’ve learned a few tricks over the years to ensure my chicken breast is always perfectly tender and flavorful. These simple tips will help you avoid common pitfalls and achieve that “melt in your mouth” perfection every time.
- Pat Your Chicken Dry: This is a small step that makes a big difference. I always pat the chicken breasts thoroughly with paper towels before applying the coating. This helps the seasoning and creamy mixture adhere better and prevents a watery layer, leading to a nicer crust.
- Ensure Even Thickness: For consistent cooking, I aim for chicken breasts of uniform thickness. If they are very thick on one side, I might pound them gently with a meat mallet or butterfly them. This ensures all parts of the chicken cook at the same rate, preventing thinner sections from drying out while thicker parts finish cooking.
- Don’t Overcook It: This is perhaps the most crucial tip for tender chicken. Overcooked chicken inevitably turns dry and tough. I rely on my meat thermometer to confirm the chicken has reached an internal temperature of 165°F (74°C) and then I take it out immediately. It’s the best way to guarantee perfect doneness.
- Always Rest the Chicken: I know it’s tempting to cut into that delicious chicken right away, but resting it is essential. After baking, I loosely tent the chicken with foil and let it sit for 5-10 minutes. This allows the juices to redistribute throughout the meat, resulting in much juicier and more tender slices.
- Balance Seasonings to Prevent Overpowering Mayonnaise Taste: If you’re worried about a strong mayonnaise flavor, I suggest balancing the rich mayo with plenty of savory seasonings like garlic powder and Parmesan. Or, opt for Greek yogurt; its tanginess naturally cuts through richness.
- Prevent a Mushy Topping: To ensure your coating is golden and not mushy, I bake the chicken uncovered. Also, I make sure the coating is spread evenly, not too thick in one spot, so it can brown nicely.
What to Serve with Your Melt In Your Mouth Chicken Breast
This Melt In Your Mouth Chicken Breast is so versatile, I find it pairs beautifully with almost any side dish. I love how it complements a wide range of flavors and textures, making it easy to create a complete and satisfying meal.
Here are some of my favorite ideas:
Vegetables:
- Roasted Asparagus with Lemon
- Garlic Parmesan Green Beans
- Steamed Broccoli with a drizzle of olive oil
- Glazed Carrots
- Sautéed Spinach
- Sweet Potato Fries
- Zucchini Noodles with pesto
Starches:
- Creamy Mashed Potatoes
- Fluffy Basmati Rice
- Quinoa Pilaf
- Roasted Red Potatoes
- Couscous with herbs
- Warm dinner rolls or crusty bread for dipping
Salads:
- Simple Garden Salad with a Vinaigrette
- Caesar Salad
- Caprese Salad
- Spinach Salad with berries and goat cheese
- Coleslaw
Frequently Asked Questions About Melt In Your Mouth Chicken Breast
I hear a lot of questions about cooking chicken breast, and I’m happy to share my insights to help you get the best results with this recipe.
Do I need to cover the chicken while baking? No, I don’t cover the chicken. Baking it uncovered allows the creamy coating to become beautifully golden brown and slightly bubbly, creating a delicious crust. If I were to cover it, the topping might stay pale and soft.
Can I use thin-sliced chicken breasts for this recipe? Absolutely! If you use thin-sliced chicken breasts, I would adjust the baking time. They will cook much faster, likely needing only 20-30 minutes. I always rely on my meat thermometer to ensure they reach 165°F (74°C) without overcooking.
How do I prevent the chicken from tasting too much like mayonnaise? I find that balancing the mayonnaise with plenty of savory ingredients like garlic powder, seasoning salt, and especially the Parmesan cheese helps to mellow out any strong mayo flavor. If you’re still concerned, I recommend using Greek yogurt instead; its tanginess works wonderfully and provides a lighter flavor profile.
How will I know when the chicken is fully cooked? My foolproof method is using a meat thermometer. I insert it into the thickest part of the chicken breast, avoiding any bone. When it registers 165°F (74°C), I know it’s perfectly cooked and safe to eat.
Can I reheat leftovers and keep them tender? Yes, you definitely can! I recommend reheating leftovers gently. I often use the microwave on a lower power setting for shorter bursts, or I warm it in the oven at a low temperature (around 300°F/150°C) until just heated through. Adding a tiny splash of chicken broth or water to the dish before reheating can help keep the chicken from drying out.
Conclusion:
I’m so excited for you to try this Melt In Your Mouth Chicken Breast recipe. It truly delivers on its promise of incredibly tender, flavorful chicken that feels both comforting and special, yet is surprisingly simple to make. No more dry chicken, no more guesswork; just deliciousness every single time.
I genuinely believe this will become one of your go-to weeknight meals, making that age-old question, “What will I cook?” so much easier to answer. I hope you feel confident and inspired to create this amazing dish in your own kitchen tonight! I’d love to hear from you; please leave a comment below with your favorite serving suggestions, any lingering questions, or share your success stories and results with me. Happy cooking!