
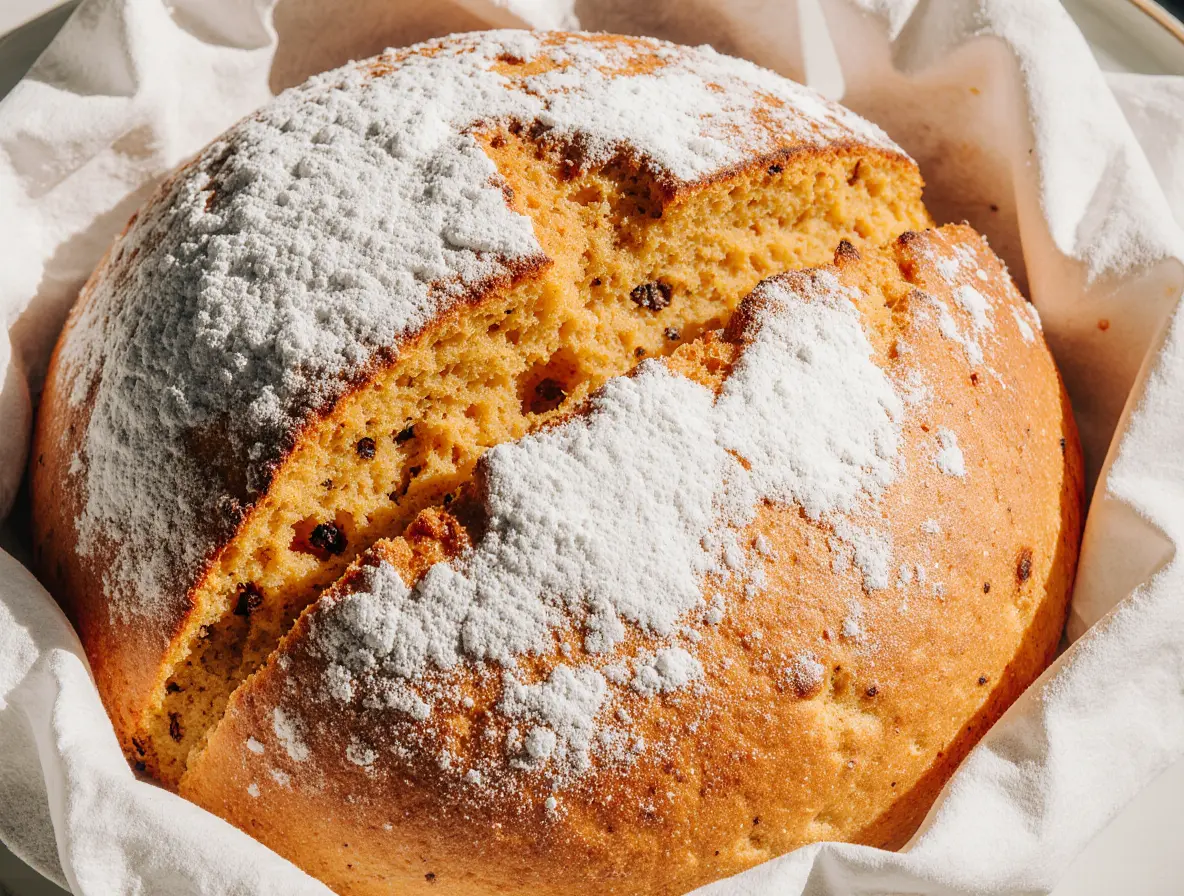
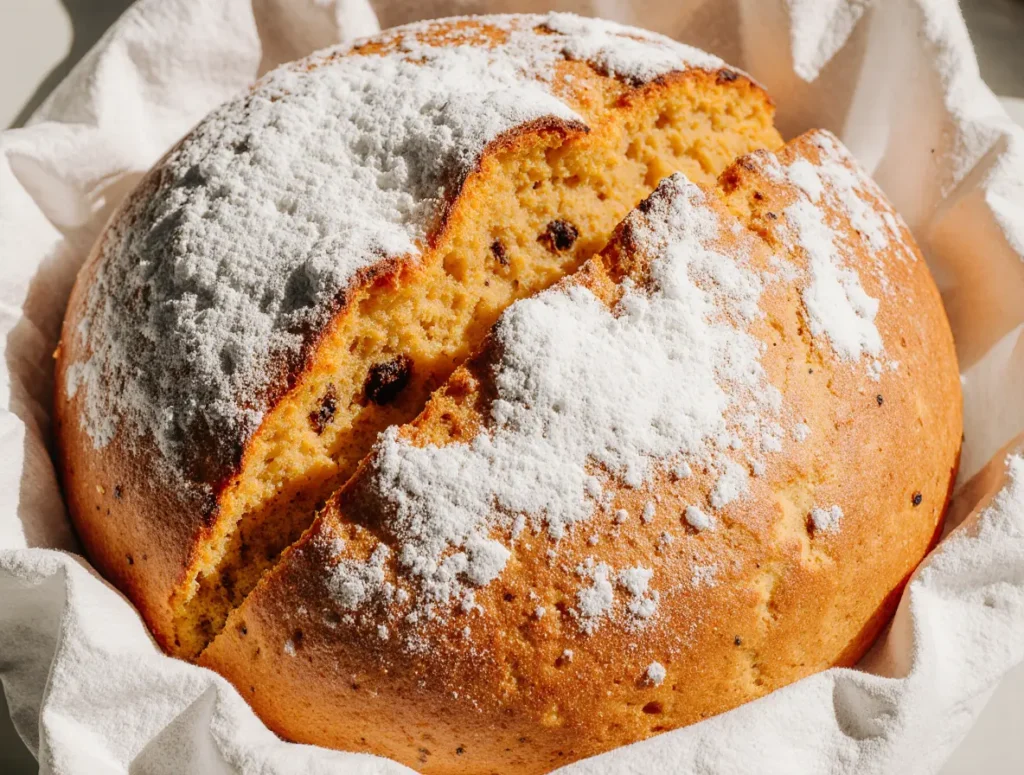
Simple Dutch Oven Pumpkin Bread Recipe

Oh, the crisp air of autumn always gets me thinking about cozy kitchens and the incredible aroma of freshly baked bread. There’s something truly magical about pulling a warm, crusty loaf from the oven, especially when it’s infused with comforting fall flavors.
Today, I am so excited to share my recipe for a delightful Dutch Oven Pumpkin Bread that is incredibly easy to make, thanks to the wonderful no-knead method. It feels like chatting with a good friend as I guide you through creating a beautiful, artisan-style loaf with minimal hands-on effort.
Table of Contents
Why You’ll Love This Dutch Oven Pumpkin Bread
I truly believe this Dutch Oven Pumpkin Bread will become a new favorite in your kitchen for so many reasons.
First, it’s delightfully simple; the no-knead approach means you spend less time actively working on the dough and more time enjoying your day. You will achieve an incredible texture, boasting a wonderfully crisp, chewy crust and a soft, tender crumb inside.
The flavor profile is simply irresistible, with warm spices and the subtle sweetness of pumpkin and honey that makes every slice a comforting treat. Plus, there’s immense satisfaction in baking your own artisan bread at home, and I love that this recipe delivers fantastic results every time.

The Magic of No-Knead Baking & Your Dutch Oven
I often hear from friends who are intimidated by bread baking, but no-knead bread completely changes the game. It’s a revelation! The fundamental principle behind no-knead bread is allowing time to do all the hard work instead of your hands. A long, slow fermentation period, typically several hours or even overnight, gives the gluten ample opportunity to develop on its own, creating that beautiful structure we all crave in a good loaf without any intensive kneading. It’s truly a “set it and forget it” kind of magic.
Now, let’s talk about the unsung hero of this recipe, the Dutch oven. The science behind baking in a Dutch oven is fascinating and crucial for achieving that professional-bakery quality crust and rise. When you place your dough in a preheated, covered Dutch oven, the trapped moisture from the dough itself creates steam inside the pot.
This steam keeps the crust soft and pliable for the first part of the bake, allowing the bread to expand fully and achieve maximum oven spring. Once the lid comes off, the direct, consistent high heat from the cast iron creates that gloriously crisp, golden-brown crust. It effectively mimics the conditions of a professional steam-injected oven, right in your home kitchen.
Essential Tools for Perfect Dutch Oven Pumpkin Bread
Having the right tools can make all the difference, but I promise you don’t need a professional setup to bake incredible bread.
A 4-6 quart Dutch oven is absolutely essential; I prefer cast iron because it retains and distributes heat so evenly, leading to a fantastic crust. For precision, especially with bread baking, a digital kitchen scale is invaluable for accurate ingredient measurements. A dough scraper is incredibly helpful for cleanly removing sticky dough from bowls and surfaces, and I find it makes shaping so much easier.
While not strictly necessary, a bread lame (or even a very sharp knife) allows you to score your loaf beautifully, which helps control where the bread expands. Finally, parchment paper is a lifesaver for transferring the delicate dough safely into the hot Dutch oven, and a wire cooling rack is a must for ensuring your bread cools properly and prevents a soggy bottom.
Gathering Your Ingredients for Dutch Oven Pumpkin Bread
Here is everything you will need to bake this lovely loaf:
- 3 cups + 2 tablespoons bread flour
- 1 1/2 teaspoons salt
- 1/2 teaspoon yeast (instant yeast or active dry yeast)
- 2/3 cup pecans (toasted)
- 1/2 teaspoon ground cinnamon
- 1/4 teaspoon ground cloves
- 1/4 teaspoon ground allspice
- 1/8 teaspoon nutmeg
- 1 cup water
- 3/4 cup pumpkin puree
- 1/4 cup honey
Step-by-Step: Making Your Dutch Oven Pumpkin Bread
I promise you, this process is much simpler than it sounds, and the results are truly rewarding!
1. Mixing and First Rise
This is where the magic begins, with minimal effort on your part. I start by combining my dry ingredients, then mix the wet ones separately before bringing them together.
In a 2 quart mixing bowl, combine flour, salt, yeast, spices, and pecans. In a small mixing bowl add water, pumpkin puree, and honey. Stir until smooth. Pour pumpkin mixture over flour mixture and stir just until all of the flour is absorbed. Cover with plastic wrap and let rise for 8-10 hours at room temperature.
2. Shaping Your Boule & Scoring Techniques
After its long rest, your dough will be bubbly and ready to be gently shaped. I always think of this step as coaxing the dough into its final, beautiful form.
First, heavily flour your work surface; this is key to preventing stickiness. Gently pour the dough onto the floured surface. Now, with floured hands, carefully pull the edges of the dough towards the center, rotating the dough as you go, until you form a round, tight ball, or “boule.”
This motion creates surface tension, which is essential for a good oven spring. Once shaped, I place the dough onto a sheet of parchment paper, which makes transferring it to the hot Dutch oven much safer and easier. Then, I cover it again with plastic wrap and let it rest for its final short rise.
Meanwhile, pour dough onto a heavily floured surface and shape into a ball. Place dough on a sheet of parchment paper. Cover with plastic wrap and let rise for 1 hours.
Scoring your bread isn’t just for looks; it’s functional. I use a bread lame, but a very sharp knife or razor blade works too. A simple “X” is classic, but you can also try a “hash” pattern or even a curved “ear” cut. These cuts allow steam to escape in a controlled manner, preventing the crust from bursting irregularly and encouraging a beautiful, even rise. It’s your chance to add a personal touch to your loaf!
3. Baking in Your Dutch Oven
This is the moment of truth, and your Dutch oven will truly shine here. Achieving that perfect crust and crumb relies on proper heat and timing.
Preheating your Dutch oven thoroughly is non-negotiable; it’s what ensures consistent high heat from the start. Once the oven reaches 450 degrees, I place my cast iron pot with its lid in the oven and let it heat for a full 30 minutes. Be very careful when handling the hot pot; I always use thick oven mitts. I gently lift the parchment paper, along with my shaped dough, and carefully place it into the searing hot pot. Covering it traps the steam, which is crucial for that initial magnificent rise.
When the oven has reached 450 degrees, place a cast iron pot with a lid in the oven and heat the pot for 30 minutes. Remove hot pot from the oven and lift the parchment paper along with the dough and gently place into the hot pan. Cover and return to oven for 30 minutes. After 30 minutes remove the lid and bake an additional 15 minutes. Remove bread from oven and place on a cooling rack to cool.
After the initial covered bake, removing the lid allows the crust to crisp up and develop its deep golden color. This is also when you see that beautiful oven spring really take hold. To check for doneness, I look for a deep brown crust, and an internal temperature of around 200-210°F (93-99°C) tells me it’s perfect. As hard as it is, letting the bread cool completely on a wire rack is essential; it allows the internal structure to set and prevents a gummy texture.
Simple Dutch Oven Pumpkin Bread Recipe
Ingredients
Equipment
Method
- In a 2 quart mixing bowl, combine flour, salt, yeast, spices, and pecans.
- In a small mixing bowl add water, pumpkin puree, and honey. Stir until smooth.
- Pour pumpkin mixture over flour mixture and stir just until all of the flour is absorbed. Cover with plastic wrap and let rise for 8-10 hours at room temperature.
- Meanwhile, pour dough onto a heavily floured surface and shape into a ball. Place dough on a sheet of parchment paper. Cover with plastic wrap and let rise for 1 hours.
- When the oven has reached 450 degrees, place a cast iron pot with a lid in the oven and heat the pot for 30 minutes. Remove hot pot from the oven and lift the parchment paper along with the dough and gently place into the hot pan. Cover and return to oven for 30 minutes. After 30 minutes remove the lid and bake an additional 15 minutes. Remove bread from oven and place on a cooling rack to cool.
Notes
Storing Your Homemade Dutch Oven Pumpkin Bread
Once your beautiful Dutch Oven Pumpkin Bread has cooled completely (and I mean completely!), proper storage will keep it fresh and delicious.
For short-term storage, I find a paper bag works wonders for maintaining a crisp crust while still allowing the bread to breathe. If you prefer a softer crust, a bread box or even a clean kitchen towel will do the trick. I try to enjoy it within 2-3 days for optimal freshness. For longer storage, this bread freezes beautifully.
Once cooled, I slice the loaf, then wrap individual slices or halves tightly in plastic wrap, and then again in aluminum foil, before placing them in a freezer-safe bag. It will keep well for up to 3 months, and you can just pull out a slice or two to thaw and toast whenever a craving strikes!
Serving Suggestions for Dutch Oven Pumpkin Bread
This Dutch Oven Pumpkin Bread is incredibly versatile, and I love finding new ways to enjoy it!
For a sweet treat, I spread a thick layer of honey butter, a dollop of cream cheese frosting, or a seasonal fruit jam like fig or apple butter on a warm slice. You might also enjoy The Ultimate Pumpkin Banana Bread. It’s also absolutely divine served alongside a scoop of vanilla ice cream or a drizzle of caramel for a comforting fall dessert.
On the savory side, it makes a fantastic companion to a hearty bowl of butternut squash soup or a rich beef stew. I’ve also served it with a cheese board featuring sharp cheddar or a creamy goat cheese, or simply toasted with a fried egg for a unique breakfast. It’s truly wonderful as part of a holiday meal spread.
Frequently Asked Questions (FAQs)
I know you might have a few questions as you embark on your baking adventure, and I’m happy to help!
- Can I use gluten-free flour? I haven’t tested this specific recipe with gluten-free flour, as bread flour is crucial for the structure here. Gluten-free baking often requires different ratios and binders, so I can’t guarantee the same results.
- What if I don’t have a Dutch oven? While a Dutch oven is ideal for that artisan crust, you can approximate it by baking on a preheated baking steel or stone, and placing a pan of hot water on the bottom rack of your oven to create steam. The results won’t be identical, but you’ll still get a delicious loaf.
- How do I know if my yeast is active? Before mixing, you can proof your active dry yeast by dissolving it in a small amount of the lukewarm water with a pinch of sugar. If it foams within 5-10 minutes, it’s active! Instant yeast usually doesn’t require proofing.
- Can I add other nuts or dried fruits? Absolutely! Feel free to swap out the pecans for walnuts, or add 1/2 cup of dried cranberries or chopped dates along with the dry ingredients.
- Why is my crust not crispy? Ensure your Dutch oven is fully preheated for at least 30 minutes, and that you’re baking uncovered for the full 15 minutes or until golden brown. Your oven might also need a bit more time.
Conclusion
I hope you feel as excited as I do about trying this fantastic Dutch Oven Pumpkin Bread! There’s truly nothing quite like the satisfaction of pulling a warm, aromatic loaf from your own oven. This no-knead method makes artisan baking approachable for everyone, and I just know you’ll love the incredible crust, tender crumb, and comforting flavors. It really is a delightful way to bring the cozy essence of autumn into your home.
I would absolutely love to hear about your baking adventures! What are your favorite additions to pumpkin bread? Do you have any questions if you get stuck? Please leave a comment below and share your thoughts and photos with our whatwillcook.com community! Happy baking!