
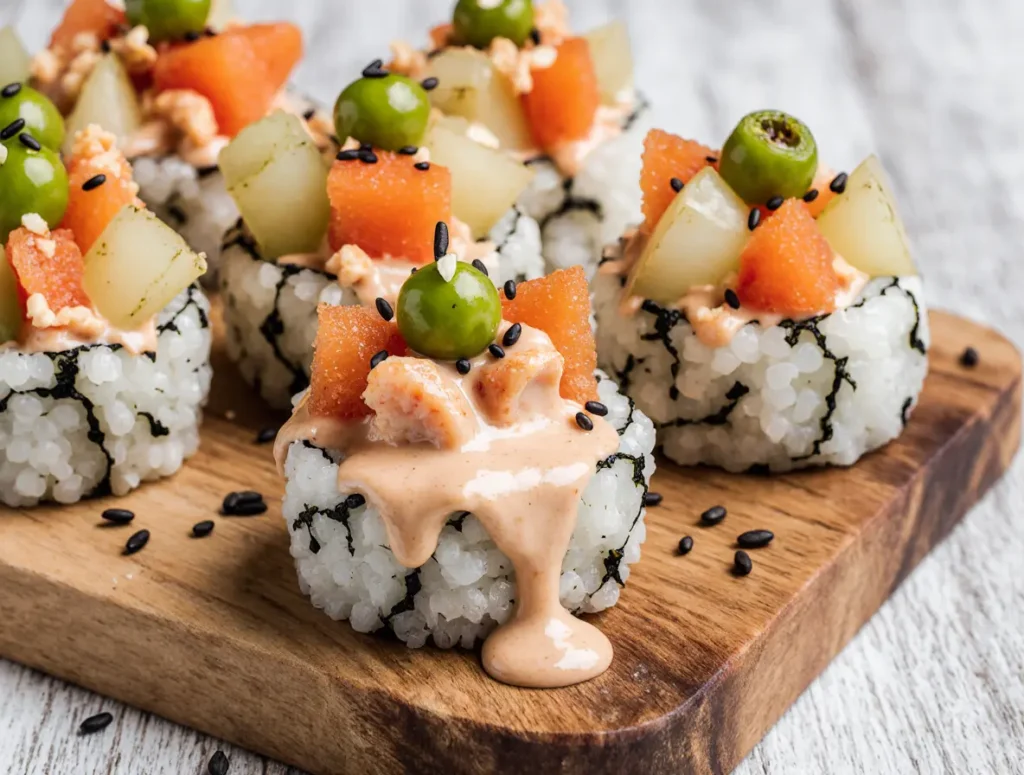
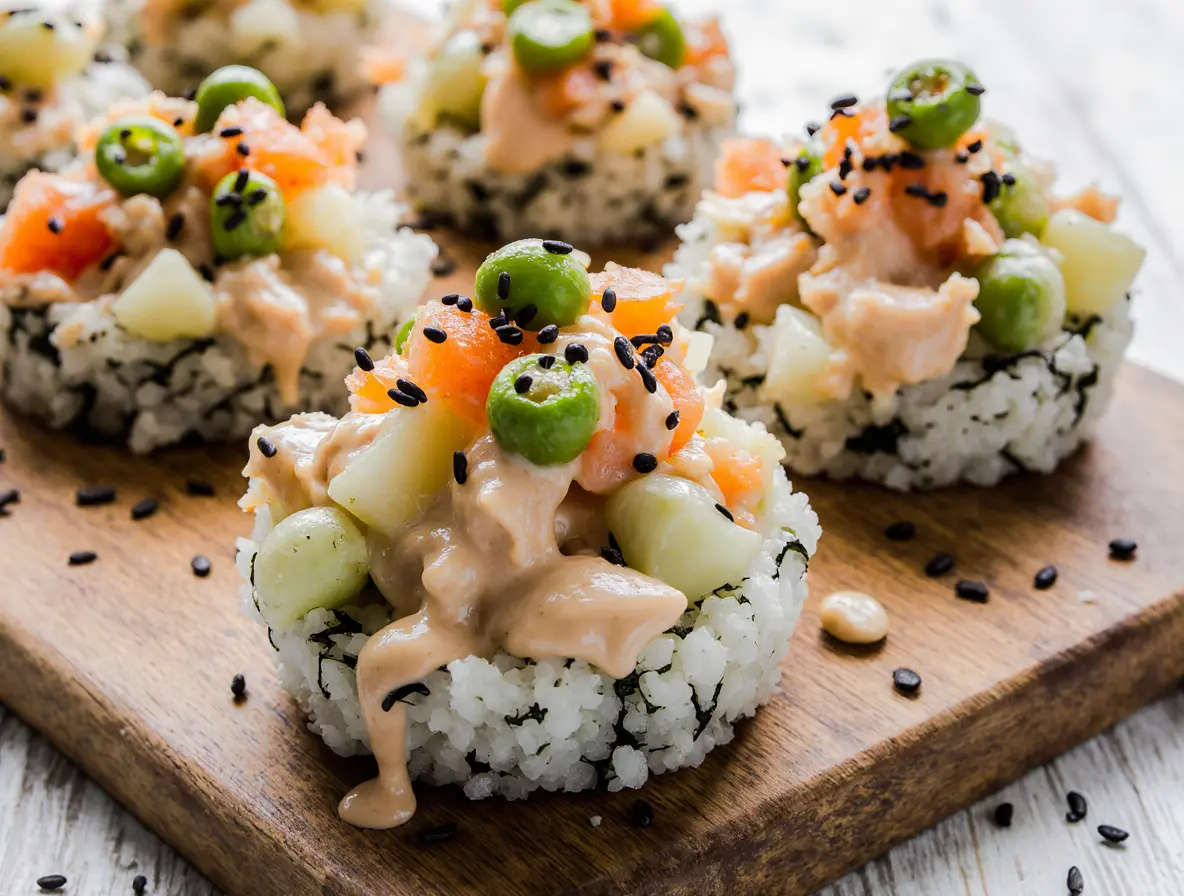
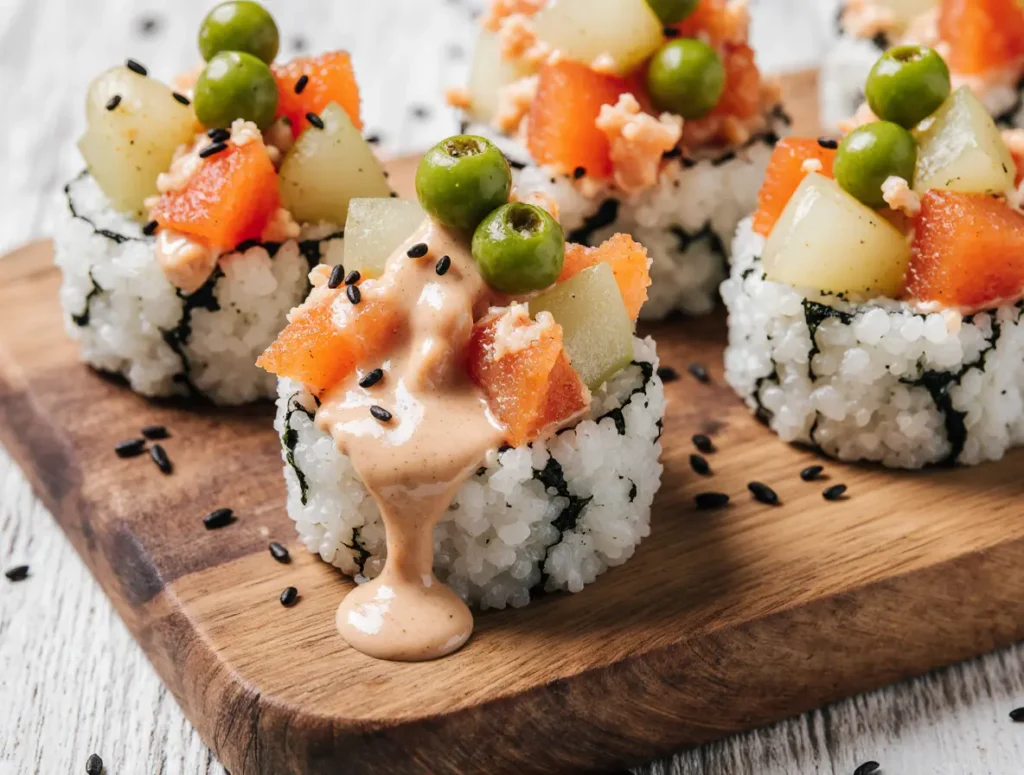
Amazing Super Easy Sushi Cups

Oh, hello there, fellow food lover! If you’re anything like me, you often find yourself staring into the fridge, wondering, “What will I cook today?” Well, let me tell you, I’ve stumbled upon a truly brilliant answer to that age-old question, and I’m bursting to share it with you. Get ready to fall head over heels for my Super Easy Sushi Cups!
This isn’t your traditional, roll-and-fuss sushi; this is sushi made simple, joyful, and incredibly accessible for everyone. Imagine all the delicious flavors of your favorite sushi roll, but baked in a muffin tin and ready to enjoy without any complicated techniques. I promise, once you try these, Super Easy Sushi Cups will become a staple in your kitchen, whether you’re whipping them up for a quick weeknight dinner or serving them as a fun party snack!
Table of Contents
Why You’ll Absolutely Love These Super Easy Sushi Cups
I truly believe these sushi cups are a game-changer, and I think you’ll agree once you taste them. Here’s why I adore them so much:
- Effortlessly Simple: Seriously, forget the sushi mat and the frustration of perfectly rolled rice. I use a muffin tin to make these, which means less mess and absolutely no rolling skills required!
- Customization is Key: I love how versatile these cups are. You can easily swap out ingredients to suit your taste, use what you have on hand, or cater to different dietary needs. It’s a choose-your-own-adventure sushi experience!
- Perfect for Any Occasion: Whether I’m looking for a quick and satisfying dinner, a fun lunchbox idea, or a crowd-pleasing appetizer for guests, these sushi cups fit the bill perfectly. They’re always a hit!
- Family-Friendly Fun: My kids absolutely love these, and I find they’re a fantastic way to introduce new flavors or get picky eaters excited about what’s on their plate. Plus, they’re so easy, even little hands can help assemble!
What Makes These Sushi Cups So Super Easy?
The name “Super Easy Sushi Cups” isn’t just a catchy title; it’s a promise! I know the idea of making sushi at home can sound intimidating, but I’ve designed this recipe to be as straightforward as possible. My secret lies in ditching the traditional rolling method entirely. If you enjoy this approach, you might also love my Amazing Spicy Salmon Sushi Bake Recipe for another easy, deconstructed sushi experience.
Instead of meticulously rolling rice and fillings, I use a muffin tin to create individual, perfectly portioned cups. This baking method also means everything cooks together beautifully, and you get that lovely slightly crispy nori texture. Plus, it’s much more forgiving than traditional sushi; if a cup isn’t perfectly shaped, no one will know once it’s baked and topped with delicious garnishes!
For me, cooking should always be an enjoyable and stress-free experience, and these sushi cups embody that philosophy. I want you to feel confident and excited in your kitchen, not overwhelmed, and this recipe delivers exactly that.
Gather Your Ingredients for Super Easy Sushi Cups
Getting started with these amazing sushi cups means gathering some fantastic ingredients. I’ve chosen things that bring a burst of flavor and a wonderful texture to every bite.
For the Sushi Cups
- 1 1/2 Pounds Salmon (with the skin removed and cubed)
- 1 Pinch Sea Salt
- 2 Tablespoons Soy Sauce or Coconut Aminos
- 2 Tablespoons Kewpie Mayo (or try my homemade mayo recipe!)
- 1 1/2 Cups Cooked Sushi Rice
- 1 Teaspoon Rice Vinegar
- 12 Nori Squares
- 1 Squeeze Kewpie Mayo
- 1 Tablespoon Sesame Seeds
- 1/4 Cup Green Onions (chopped)
Smart Substitutions for Your Sushi Cups
I love how flexible this recipe is! Feel free to mix and match with what you have or what your family prefers. Here are some of my go-to substitution ideas:
| Ingredient | Substitution Options | Notes |
|---|---|---|
| Salmon | Cooked Tuna, Cooked Shrimp, Crab Meat, Shredded Chicken | Ensure protein is cooked and shredded/cubed small. |
| Soy Sauce | Coconut Aminos, Tamari (for gluten-free) | Adjust seasoning to taste. |
| Kewpie Mayo | Regular Mayonnaise, Vegan Mayo, Homemade Mayo | Kewpie has a richer, tangier flavor; adjust seasoning if using regular. |
| Sushi Rice | Short-Grain White Rice, Cauliflower Rice (low-carb option) | Ensure rice is cooked to be sticky. Cauliflower rice will change texture significantly. |
| Nori Squares | Rice Paper Wraps (for a different texture, may need to be cut) | Nori provides classic sushi flavor and crispness when baked. |
| Green Onions | Chives, Cilantro, finely chopped Red Onion |
Essential Equipment You’ll Need
You don’t need any fancy gadgets to make these sushi cups. I bet you already have most of these in your kitchen!
- Standard Muffin Tin
- Large Mixing Bowls
- Measuring Cups and Spoons
- Sharp Knife (for dicing salmon)
- Cutting Board
- Optional: Rice Cooker (for perfectly cooked rice every time!)
How to Make Super Easy Sushi Cups (Step-by-Step Guide)
Ready to make some magic? I’m going to walk you through each step, making it super simple for you to create these delightful Super Easy Sushi Cups.
- Prep Your Oven and Muffin Tin: Start by preheating your oven to 400 F and lightly greasing a standard size muffin tin.
- Maya’s Tip! A little non-stick spray goes a long way to ensure your nori doesn’t stick.
- Prepare the Salmon Mixture: Next, add your cubed salmon, sea salt, soy sauce, and mayo to a large bowl. Toss to coat well, until all of the ingredients are fully combined.
- Season the Sushi Rice: Then, add your cooked rice to a bowl and add in your vinegar. Mix until all of the rice is coated in the vinegar.
- Maya’s Tip! Gently folding the vinegar into the rice helps it retain its stickiness without over-mashing.
- Ready the Nori Sheets: Prepare your nori sheets by laying them out on a countertop. If using large nori sheets, cut them into squares small enough to fit into each cavity of your muffin tin.
- Assemble the Rice Base: Add about 2-3 tablespoons of your rice mixture to each nori sheet, then fold and place inside the muffin tin. Repeat until all of the cavities of your muffin tin are filled.
- Maya’s Tip! Press the rice firmly into the nori and then into the muffin tin to create a sturdy base for your cups.
- Top with Salmon: Then, top each nori cup with your salmon mixture. This will be about 2 tablespoons, depending on how big your salmon is!
- Bake to Perfection: Finally, bake your cups for 15 minutes, or until the salmon is cooked to your liking.
- Garnish and Serve: Once done, remove from the oven, top with your garnishes of choice, serve, and enjoy! These cups are best eaten the same day, but can be stored in an airtight container, in the fridge, for up to two days.
Amazing Super Easy Sushi Cups
Ingredients
Equipment
Method
- Start by preheating your oven to 400 F and lightly greasing a standard size muffin tin.
- Next, add your cubed salmon, sea salt, soy sauce, and mayo to a large bowl. Toss to coat well, until all of the ingredients are fully combined.
- Then, add your cooked rice to a bowl and add in your vinegar. Mix until all of the rice is coated in the vinegar.
- Prepare your nori sheets by laying them out on a countertop. If using large nori sheets, cut them into squares small enough to fit into each cavity of your muffin tin.
- Add about 2-3 tablespoons of your rice mixture to each nori sheet, then fold and place inside the muffin tin. Repeat until all of the cavities of your muffin tin are filled.
- Then, top each nori cup with your salmon mixture. This will be about 2 tablespoons, depending on how big your salmon is!
- Finally, bake your cups for 15 minutes, or until the salmon is cooked to your liking.
- Once done, remove from the oven, top with your garnishes of choice, serve, and enjoy! These cups are best eaten the same day, but can be stored in an airtight container, in the fridge, for up to two days.
Notes
Simplified Sushi Rice Preparation
Getting that perfect sticky sushi rice texture is easier than you think! If you don’t have “sushi rice” specifically, short-grain white rice works wonderfully. I always start by rinsing my rice thoroughly under cold water until the water runs clear; this removes excess starch and helps it become sticky. Then, cook it according to package directions. Once cooked, gently fold in a little rice vinegar, as I do in the recipe, to give it that signature sushi flavor and help with stickiness. You’ll have perfect rice for your Super Easy Sushi Cups in no time!
Unleash Your Inner Sushi Chef: Customization Ideas for Your Super Easy Sushi Cups
This is where the real fun begins! One of the reasons I love my Super Easy Sushi Cups so much is how endlessly customizable they are. Don’t be afraid to experiment and make them truly your own.
Creative Protein & Veggie Fillings
Think beyond salmon! The possibilities for delicious fillings are practically endless.
- Seafood: Canned tuna (mixed with mayo/sriracha), cooked bay shrimp, imitation crab meat, smoked salmon.
- Other Proteins: Shredded chicken (teriyaki seasoned), which can also be used in other dishes like my Ultimate Japanese Katsu Bowls with Crispy Chicken, baked tofu cubes, tempeh crumbles.
- Vegetarian/Vegan: Avocado slices, cucumber matchsticks, shredded carrots, bell peppers, corn, edamame.
Dazzling Sauces & Toppings
Elevate your sushi cups with some amazing drizzles and crunchy additions!
- Sauces: Sriracha mayo, eel sauce (store-bought or homemade), spicy garlic mayo, sweet chili sauce, ponzu.
- Crunchy Toppings: Furikake, crispy fried onions, toasted sesame seeds, everything bagel seasoning, panko breadcrumbs.
- Fresh Toppings: Thinly sliced jalapeños, cilantro, microgreens, a drizzle of sesame oil.
Dietary Adjustments
I believe everyone should be able to enjoy delicious food, and these sushi cups are easy to adapt for various dietary needs.
| Dietary Need | How to Adapt Your Super Easy Sushi Cups |
|---|---|
| Gluten-Free | Use Tamari or Coconut Aminos instead of soy sauce. Ensure mayo is GF. |
| Dairy-Free | Use a good quality vegan mayonnaise. |
| Vegan/Vegetarian | Omit salmon. Use baked tofu, tempeh, or a variety of fresh veggies (avocado, cucumber, shredded carrots) as the main filling. |
| Low-Carb | Substitute sushi rice with seasoned cauliflower rice. |
Meal Prep & Storage Tips for Super Easy Sushi Cups
These Super Easy Sushi Cups are fantastic for meal prepping, giving you delicious options throughout your busy week. I always make a few extra!
- Best Storage: Store cooled sushi cups in an airtight container in the refrigerator for up to 2-3 days. I like to keep any garnishes, like green onions or sesame seeds, separate until I’m ready to serve to keep them fresh and vibrant.
- Reheating: I gently reheat mine in a toaster oven or air fryer at 300°F (150°C) for 5-7 minutes, or until warmed through. This helps the nori get a little crisp again, which I love! I usually avoid the microwave if I want to maintain that texture.
- Freezing: While possible, I find it’s not ideal as the nori can become soggy upon thawing. If you absolutely need to freeze, I recommend freezing only the rice and salmon mixture in separate portions, then assembling with fresh nori and baking when you’re ready to eat.
Serving Suggestions & Occasions
These Super Easy Sushi Cups are incredibly versatile, and I love finding new ways to enjoy them!
- Quick Weeknight Dinner: I often pair them with a simple miso soup or a fresh side salad for a complete and satisfying lunch or dinner meal.
- Party Appetizer: Arrange them on a platter for an impressive, yet incredibly easy, finger food. They always disappear fast!
- Kid-Friendly Lunchboxes: Pack them cold for a fun, nutritious, and exciting meal that beats a sandwich any day.
- Picnics & Potlucks: They’re so easy to transport and serve, making them a perfect addition to any gathering.
- Meal Prep: I love making a batch on Sunday for quick grab-and-go meals throughout the week. They save me so much time!
Frequently Asked Questions (FAQs)
I get a lot of questions about making sushi at home, so I wanted to answer some of the common ones I hear about my Super Easy Sushi Cups!
- Can I use regular rice instead of sushi rice? Yes, you can use short-grain white rice. The key is to rinse it thoroughly before cooking and season it with rice vinegar after, as this helps achieve the sticky texture needed for the cups.
- My nori is soggy after baking, what went wrong? This can happen if the cups were overfilled with too much moisture or baked at too low a temperature. Ensure your salmon mixture isn’t overly wet, and don’t press the rice so hard it releases water. A slightly higher temperature or shorter bake time can help keep the nori crisp.
- How do I make sure the sushi cups hold their shape? Firmly pressing the rice into the nori and then into the muffin tin cavity is crucial. Don’t be afraid to compact them well. The baking process also helps them set.
- Can I make these ahead of time? You can prep the salmon mixture and cook the rice a day in advance. Assemble and bake just before serving for the best texture, especially for the nori. Baked cups are best eaten the same day but store well for up to two days.
- What if I don’t like salmon? No problem! See my “Creative Protein & Veggie Fillings” section for delicious alternatives like cooked tuna, shrimp, crab meat, or vegetarian options.
Enjoy Your Homemade Super Easy Sushi Cups!
I truly hope you’re feeling inspired to try these Super Easy Sushi Cups in your own kitchen! I designed this recipe to take the intimidation out of making sushi, making it approachable and, most importantly, incredibly delicious. There’s something so satisfying about enjoying homemade flavors, and I know these will bring a smile to your face.
I can’t wait to hear how you make them your own! Please leave a comment below with your favorite customizations, ask any questions you might have, or simply share how much you loved them. And if you snap a photo, be sure to tag @whatwillcook on social media so I can see your beautiful creations! Happy cooking!