
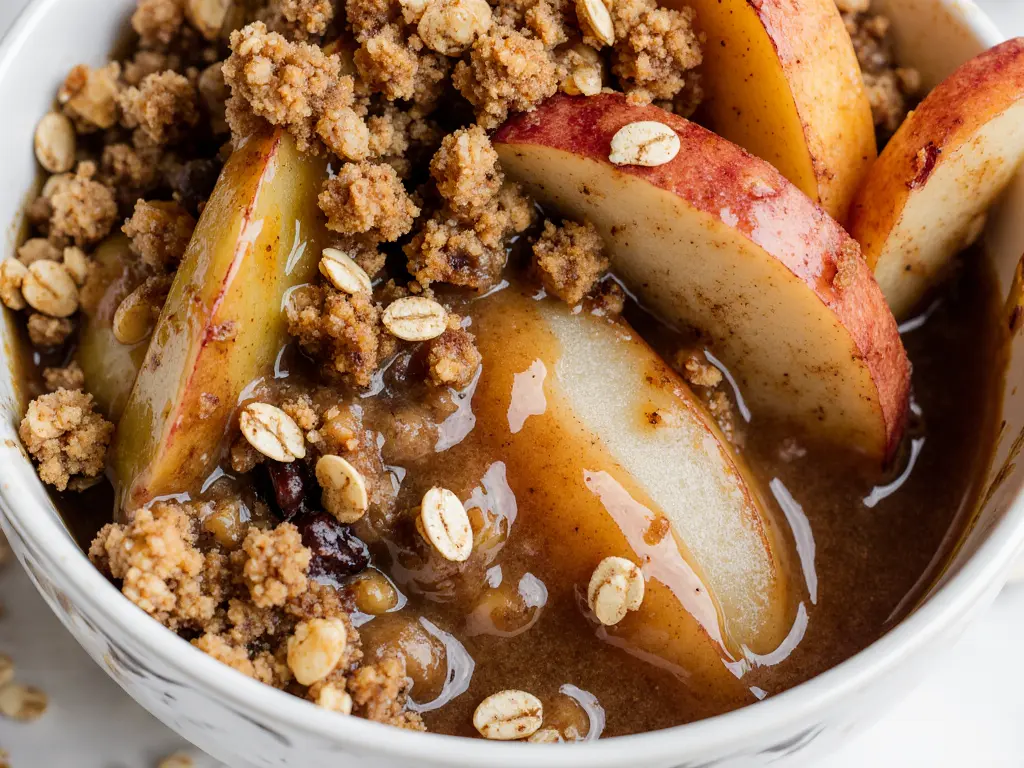
Amazing & Simple: The Best Apple Crisp

Do you ever find yourself staring into the fridge, wondering “What will I cook?” I know I do, all the time! That’s why I absolutely love creating recipes that make those everyday decisions a little bit easier and a whole lot more delicious. Today, I’m so excited to share my go-to recipe for the most comforting and incredibly simple Apple Crisp.
This isn’t just any apple crisp; it’s a dish designed to bring warmth and joy to your table without adding stress to your busy schedule. In about 50-60 minutes total, you can have a bubbly, sweet, and perfectly crispy dessert ready to delight everyone. Get ready to fall in love with your new favorite fall treat!.
Table of Contents
Why This is THE BEST Apple Crisp You’ll Ever Make
I genuinely believe this apple crisp recipe stands out, and I think you will too. I’ve perfected it to ensure it’s easy to follow for any home cook, no matter your experience level. I love how the tender, perfectly spiced apples meet that wonderfully crunchy, buttery topping in every single bite.
I crafted this recipe for the perfect balance, ensuring the apples are sweet and tender, but never mushy, underneath a gloriously golden, oat-filled crisp. The spice blend I use really brings out the natural sweetness of the apples without overpowering them. It’s truly a comforting classic dessert simplified for your busy life, promising maximum flavor with minimal fuss.
Choosing the Perfect Apples for Your Apple Crisp
Selecting the right apples is key to a fantastic apple crisp, in my opinion. I usually look for a balance of tartness and sweetness, along with apples that hold their shape well during baking. You want them to be tender, not turn into complete mush!
Here are a few varieties I love using, and why:
- Golden Delicious: These are my go-to choice for their sweet flavor and relatively soft texture that bakes down beautifully. They are reliable and consistent.
- Granny Smith: If you love a tart crisp, Granny Smiths are fantastic. Their firm texture holds up well, and their acidity provides a lovely contrast to the sweet topping.
- Honeycrisp: These offer a wonderful balance of sweetness and tartness, and they maintain a nice, slightly firm texture even after baking. They are a personal favorite.
- Fuji: Sweet and crisp, Fujis are another great all-around apple that will give your crisp a lovely flavor and good texture.
- Braeburn: I like Braeburns for their slightly spicy, sweet-tart flavor, and firm flesh that stands up well to baking.
Feel free to use one variety or mix a couple for a more complex flavor profile!
Ingredients for The Best Apple Crisp
I always keep these simple ingredients on hand so I can whip up this delightful crisp whenever the craving strikes.
For the Apple Filling:
- 6 golden delicious apples (peeled and chopped (other varieties can be used, can also be sliced))
- 2 Tbsp granulated sugar
- 3/4 tsp ground cinnamon
- 1 1/2 tsp lemon juice
For the Crisp Topping:
- 1 cup light brown sugar
- 3/4 cup old fashioned oats (quick oats can be used, but it may have a slightly different texture)
- 3/4 cup all-purpose flour
- 1 tsp ground cinnamon
- pinch of kosher salt
- 1/2 cup cold unsalted butter (diced into small cubes)
How to Make The Best Apple Crisp (Step-by-Step Instructions)
Making this apple crisp is incredibly straightforward, and I’ll walk you through each step. You’ll have a warm, bubbly dessert in no time!
- Preheat oven to 350 F degrees. Butter an 8×8 baking dish, or spray with non-stick cooking spray. Set aside.
- In a mixing bowl, add chopped apples, granulated sugar, 3/4 tsp of the cinnamon and lemon juice. Stir to combine, then transfer to prepared baking dish.
- In a separate mixing bowl, add topping ingredients (brown sugar, oats, flour, 1 tsp cinnamon, salt, and diced cold butter).
- Use a pastry cutter to cut the butter into the oat mixture, using a slight downward twisting motion, until mixture resembled pea-sized crumbs. Alternatively, you can use two forks or even your hands to cut butter into the mixture.
- Spread topping over apples in baking dish, and gently pat to even it out. Bake 40-50 minutes, until golden brown and bubbly.
- Serve warm and enjoy! I love to top mine with some vanilla bean ice cream, or whipped cream.
Amazing & Simple: The Best Apple Crisp
Ingredients
Equipment
Method
- Preheat oven to 350 F degrees. Butter an 8×8 baking dish, or spray with non-stick cooking spray. Set aside.
- In a mixing bowl, add chopped apples, granulated sugar, 3/4 tsp of the cinnamon and lemon juice. Stir to combine, then transfer to prepared baking dish.
- In a separate mixing bowl, add topping ingredients (brown sugar, oats, flour, 1 tsp cinnamon, salt, and diced cold butter).
- Use a pastry cutter to cut the butter into the oat mixture, using a slight downward twisting motion, until mixture resembled pea-sized crumbs. Alternatively, you can use two forks or even your hands to cut butter into the mixture.
- Spread topping over apples in baking dish, and gently pat to even it out. Bake 40-50 minutes, until golden brown and bubbly.
- Serve warm and enjoy! I love to top mine with some vanilla bean ice cream, or whipped cream.
Notes
Creative Variations & Ingredient Swaps for Your Apple Crisp
I love how versatile this apple crisp recipe is! It’s fantastic as is, but I also enjoy playing around with it to suit my mood or what I have on hand. Here are some of my favorite ways to mix things up.
Flavor Boosters & Add-Ins
I often throw in a few extra ingredients to deepen the flavor or add texture. A handful of chopped pecans or walnuts in the topping adds a lovely nutty crunch. Sometimes I’ll add dried cranberries for a tart chewiness, or a tiny bit of freshly grated ginger for a subtle warmth. A little bit of orange zest in the apple filling can brighten the flavors beautifully.
Topping Twists (Beyond Oats)
While I adore the oat topping, sometimes I like to try something different. For an oat-free streusel, I might increase the flour and brown sugar, and then add extra nuts. I’ve also experimented with different spice profiles; adding a pinch of cardamom or nutmeg alongside the cinnamon can give the crisp a wonderful, unique aroma.
Gluten-Free & Oat-Free Options
I understand that dietary needs vary, and I want everyone to enjoy this crisp! For a gluten-free version, I simply swap the all-purpose flour for a good gluten-free flour blend. If you’re concerned about oats, make sure to use certified gluten-free oats. If you need an entirely oat-free topping, you can increase the amount of flour and perhaps add more nuts to maintain that lovely texture.
Sugar & Butter Alternatives
I love that this recipe is quite adaptable when it comes to sweeteners and fats. Here are some swaps I’ve tried:
| Ingredient | Substitution Options | Notes |
|---|---|---|
| Granulated Sugar | Maple syrup, Honey (reduce liquid elsewhere) | Adjust to taste, may alter moisture. |
| Brown Sugar | Coconut sugar, other brown sugar alternatives | May slightly change flavor profile. |
| Butter | Dairy-free butter sticks, Coconut oil (solid) | Ensure good quality for best flavor. |
Make-Ahead & Freezing Instructions for Apple Crisp
As a busy person, I appreciate anything that makes life easier, and make-ahead options for desserts are a lifesaver! This apple crisp is fantastic for preparing in advance.
Make Ahead
I often get a head start on my apple crisp. You can prepare the apple filling mixture and the crisp topping separately, then store them in airtight containers in the refrigerator for up to 2 days. When you’re ready to bake, simply assemble and proceed with the recipe. Alternatively, I sometimes assemble the entire crisp in the baking dish, cover it tightly with plastic wrap, and refrigerate it for up to 24 hours before baking. Just add about 10-15 minutes to the baking time if baking from chilled.
Freezing Unbaked Apple Crisp
I find freezing an unbaked crisp is a great option for future desserts! Assemble the crisp in an oven-safe, freezer-safe dish. Wrap it tightly with a layer of plastic wrap and then a layer of aluminum foil. I label it with the date and cooking instructions, then freeze for up to 3 months. To bake from frozen, remove the foil and plastic wrap, cover loosely with new foil, and bake at 350°F for about 60-75 minutes, removing the foil for the last 15-20 minutes to allow the topping to crisp and brown.
Freezing Baked Apple Crisp
Yes, you can absolutely freeze a baked apple crisp! I let the crisp cool completely after baking. Then, I wrap the entire dish (or individual portions) tightly in plastic wrap, followed by aluminum foil. Again, I label it with the date. It will keep well in the freezer for up to 2 months. Thaw overnight in the refrigerator before reheating.
How to Store & Reheat The Best Apple Crisp
I always plan for leftovers because this crisp is just as good the next day! Knowing how to store and reheat it properly ensures you can enjoy it again and again.
Storing Leftovers
Once the apple crisp has cooled completely, I cover the baking dish tightly with plastic wrap or transfer individual portions to an airtight container. Store it in the refrigerator for up to 3-4 days.
Reheating from Chilled (Oven & Microwave)
To reheat from chilled in the oven, I place the crisp (covered loosely with foil to prevent over-browning) in a 300°F oven for about 15-20 minutes, or until warmed through. For a quicker option, I sometimes microwave individual servings for 30-60 seconds, until heated to my liking. The topping might not be as crispy, but it’s still delicious!
Reheating from Frozen (Oven)
If I’m reheating a previously baked, frozen crisp, I’ll first thaw it in the refrigerator overnight. Then, I reheat it in a 300°F oven, covered loosely with foil, for about 20-30 minutes, or until it’s hot and bubbly. If I want to crisp up the topping, I’ll remove the foil for the last 5-10 minutes.
Serving Suggestions & Perfect Pairings for Apple Crisp
While this apple crisp is utterly delightful on its own, I love to elevate it with a few simple additions. My absolute favorite way to serve it is warm, straight from the oven, with a generous scoop of vanilla bean ice cream melting into the sweet apples.
A dollop of freshly whipped cream is another fantastic choice, adding a lightness that contrasts beautifully with the rich crisp. Sometimes, I’ll drizzle a homemade caramel sauce over the top for an extra touch of decadence. To complete the experience, I enjoy pairing it with a hot cup of coffee or a mug of spiced apple cider on a chilly evening. For a more sophisticated pairing, a late-harvest Riesling or an ice wine can be a wonderful complement to the sweet flavors.
Frequently Asked Questions About The Best Apple Crisp
I know you might have a few questions about making this delicious dessert, so I’ve gathered some common ones to help you out!
What kind of apples are best for apple crisp?
I generally recommend a mix of sweet and tart apples that hold their shape well, like Golden Delicious, Honeycrisp, Granny Smith, Fuji, or Braeburn. Using a combination often gives the best flavor and texture.
Do I need to peel the apples for apple crisp?
No, you don’t have to peel the apples. It’s entirely up to your preference! I often peel mine for a smoother texture, but leaving the skin on saves time and adds fiber.
Does apple crisp need to be refrigerated?
Yes, I always refrigerate any leftover apple crisp. Once it has cooled to room temperature, cover it tightly and store it in the refrigerator.
Can you freeze apple crisp?
Absolutely! I’ve had great success freezing apple crisp both baked and unbaked. Just make sure it’s properly wrapped to prevent freezer burn. You can check my “Make-Ahead & Freezing Instructions” section for more details.
How long does apple crisp last?
When stored properly in an airtight container in the refrigerator, I find that apple crisp lasts for about 3-4 days.
Why is my apple crisp topping not crispy?
A soggy topping can happen if the butter isn’t cold enough when you mix it in, or if the crisp isn’t baked long enough. I make sure to use cold, diced butter and bake until the topping is a deep golden brown. If it’s browning too quickly, I tent it with foil.
How do I prevent a watery apple crisp?
I find that using apples that aren’t overly juicy, or sometimes adding a teaspoon or two of flour or cornstarch to the apple mixture before baking, helps to absorb excess liquid. Allowing the crisp to cool completely after baking also helps it set and thicken.
Conclusion: Your New Go-To Recipe for The Best Apple Crisp
I genuinely hope this recipe for “The Best Apple Crisp” becomes a cherished favorite in your kitchen. I’ve designed it to be simple, comforting, and utterly delicious, proving that you don’t need fancy ingredients or complex techniques to create something truly special. I promise, it’s one of those recipes that will answer the “What will I cook?” question with a smile.
I can’t wait for you to try this! Please leave a comment below with your thoughts, or if you have any questions. I love hearing from you! If you make this crisp, I’d be absolutely thrilled if you shared your results and tagged whatwillcook on social media with your delicious photos. Happy baking!